
Propagation
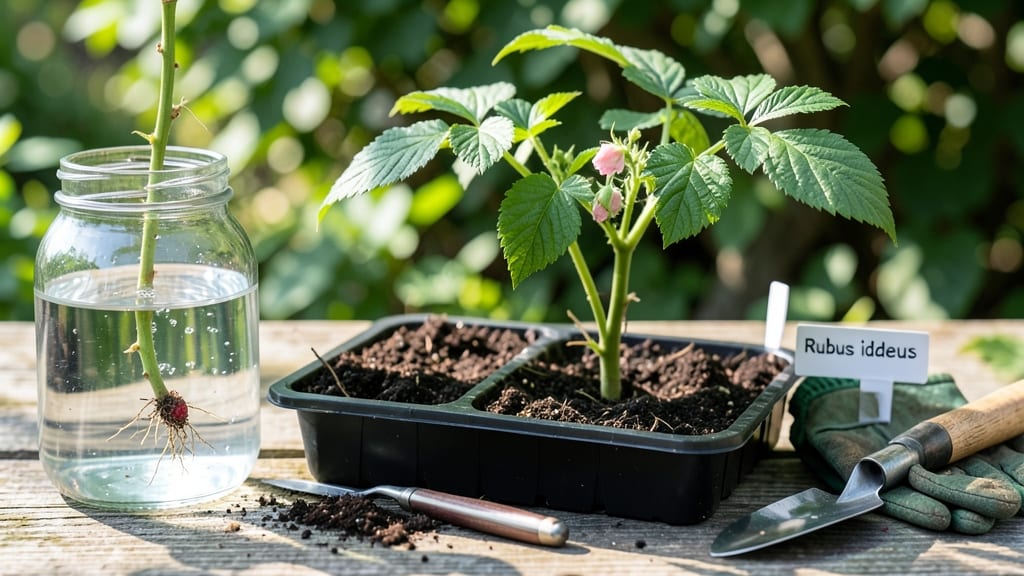
Growing raspberries from fruit means turning last summer's berries into next year's vines. 🌱 The process starts with patience—these plants take 2+ years to bear fruit, but the journey is worth it for homegrown berries you can't buy at stores.
I've rooted raspberries from grocery store fruit, and with the right method, you can too. You'll need just three things: a ripe raspberry, a small pot with moist potting mix, and a warm spot with bright indirect light.
The seeds inside those tiny fruits hold the potential for your own thriving patch. Most people skip this step, but it's where the magic begins—every seed could grow into a unique plant. By summer, you'll have tiny seedlings ready to transplant.
They'll grow fast once established, and within a year, you'll see canes shooting up. The first harvest won't come until the second growing season, but the anticipation makes it all worthwhile. This method works for both summer-bearing and fall-bearing varieties.
Just be ready to wait—nature's timeline isn't ours, but the payoff of homegrown raspberries makes every step worth it.
📚 In This Guide
- What you need
- Instructions
- Tips and common mistakes
- Wrapping up and next steps
What you need
- ● Raspberries: Fresh, ripe raspberries with seeds (organic is best to avoid pesticides). Aim for at least 5-10 berries for better success rates.
- ● Containers: Small pots or seed trays (4-6 inches deep) with drainage holes.
- ○ Optional: A larger pot (10+ inches) for transplanting once roots form.
- ● Potting Mix: Well-draining, sterile seed-starting mix (avoid garden soil—it can harbor diseases). A 5-10 pound bag should suffice for starters.
- ● Watering Can or Spray Bottle: For gentle hydration (overwatering is the enemy of tiny seeds!).
- ● Plastic Bag or Clear Lid: To create a humid greenhouse effect (e.g., a ziplock bag with holes or a propagator lid).
- ○ Heat Mat (Optional but Helpful): A seedling heat mat (70–75°F range) speeds up germination.
- ● Fertilizer: A balanced, water-soluble fertilizer (5-10-5 ratio) or compost tea for post-germination growth.
- ● Location: A sunny spot (6+ hours of direct light daily) or a grow light for indoor setups.
- ● Temperature: Ideal germination range: 65–75°F. Raspberries thrive in USDA Zones 4–9.
- ● Patience: Germination can take 2–6 weeks—stay consistent with care!
- ○ Safety Gear (Optional): Gloves (if handling prickly canes later) and a dust mask (when mixing soil).
Step-by-Step instructions for growing raspberries from fruit
Here's the method I've used to root raspberry fruit and establish healthy vines—no fancy equipment needed.
🌱 Step 1: Select and Prepare the Raspberry Fruit
Choose firm, ripe raspberries that still have their stems attached—these are your rooting candidates. I always pick the plumpest ones from the center of the cluster since they're most likely to have viable seeds. Gently rinse them under cool water to remove any debris, then pat dry with a paper towel.
Here's the thing—you don't need to remove the seeds. The entire fruit will root, but the seeds inside will germinate into new plants. Place the cleaned raspberries in a shallow container with about 1 inch of water, stem-end down. Change the water daily to prevent mold. You'll see tiny roots emerge from the stem in about 1-2 weeks.
💧 Step 2: Encourage Root Growth Before Planting
Once roots reach about 1-2 inches long, it's time to transition them to soil. I like to use a small container with 2-3 inches of moist potting mix—just enough to hold the raspberry fruit upright with the roots submerged. Gently press the soil around the fruit to secure it without compacting.
Place the container in a warm spot with bright, indirect light—a windowsill facing east or west works perfectly. Avoid direct sunlight at first, as it can stress the delicate roots. Keep the soil consistently moist but not soggy; you'll know it's right when the surface stays slightly damp but doesn't glisten.
☀️ Step 3: Transition to Soil and Provide Optimal Conditions
After about 4-6 weeks, you'll notice new leaves sprouting from the raspberry fruit—that's your signal to transplant. Choose a pot at least 6 inches deep with drainage holes, and fill it with a mix of 50% potting soil and 50% perlite for extra drainage.
Dig a small hole, place the rooted raspberry gently into the soil, and cover it with about 1 inch of soil mix. Water lightly to settle the soil around the roots. Move the pot to a spot with 6-8 hours of sunlight daily, gradually increasing exposure over a week to avoid shock. You'll see stronger growth when the leaves turn a deeper green and new stems begin to form.
🌿 Step 4: Maintain and Support Vine Growth
Once the raspberry plant establishes itself, it will grow rapidly. I always add a support stake or trellis as soon as the vines reach about 6 inches tall—raspberries need support to grow upright and produce fruit efficiently. Use soft ties to attach the vines to the trellis gently, checking them weekly to ensure they're not too tight.
Water deeply about once a week, allowing the top 2 inches of soil to dry out between waterings. Raspberries thrive in well-draining soil, so avoid letting the roots sit in water. Fertilize lightly with a balanced, water-soluble fertilizer every 4-6 weeks during the growing season to encourage lush, healthy growth.
⏰ Step 5: Prepare for Winter and Future Fruit Production
In the fall, as temperatures drop below 40°F, raspberry plants enter dormancy. I cut back the canes to about 1 foot tall and mulch the base with 2-3 inches of straw or shredded leaves to protect the roots from freezing. This also helps retain moisture and regulate soil temperature.
In early spring, remove the mulch and fertilize again to kickstart new growth. Raspberries typically produce fruit on second-year canes, so be patient—it may take up to 2 years for your rooted raspberries to bear fruit. But once they do, you'll have a productive vine that rewards your patience with delicious harvests for years to come.
Tips & tricks for thriving raspberry vines from fruit
These simple secrets will help your raspberry fruit grow into strong, productive vines with minimal fuss.
Rooting Success: For faster root growth in Step 1, use a clear container so you can monitor progress without disturbing the fruit. The 1-2 weeks timeframe can vary—if you don't see roots after 2 weeks, gently check by lifting the fruit from the water. If roots are less than 1 inch long, return it to water for another week.
Lighting Strategy: In Step 2, east or west-facing windows provide perfect bright, indirect light, but if that's not an option, use a grow light 6-8 inches above the container for 12-14 hours daily. Too much direct sun at this stage can scorch the delicate roots before leaves form.
Transplant Timing: The 4-6 weeks window for transplanting in Step 3 can feel like forever, but wait until you see those first leaves—this means the roots have established a strong network. If your raspberry sits in water too long after roots form, it can develop root rot, so transition to soil as soon as you spot leaves.
Support System: When your vines reach 6 inches tall in Step 4, don't skimp on support. Raspberries grow aggressively, and without proper stakes or trellises, canes will flop and break. I use bamboo stakes with soft plant ties—they're gentle on growing stems and easy to adjust as your plants grow.
Pro Tips for Grow Raspberries From Fruit
- These simple secrets will help your raspberry fruit grow into strong, productive vines with minimal fuss.
- Rooting Success: For faster root growth in Step 1, use a clear container so you can monitor progress without disturbing the fruit.
- Lighting Strategy: In Step 2, east or west-facing windows provide perfect bright, indirect light, but if that's not an option, use a grow light 6-8 inches above the container for 12-14 hours daily.
Frequently asked questions
Got questions about growing raspberries from fruit?
You’re not alone! Here are answers to some of the most common queries to help you root your raspberries like a pro.
Can I grow raspberries from any store-bought berry?
Not all store-bought raspberries will work—look for organic, seedless varieties (like Heritage or Boyne Golden) with plump, firm fruit. Conventionally grown berries are often treated with fungicides or wax coatings that inhibit rooting. Skip the pre-treated or overly soft berries!
How long does it take for raspberry seeds to sprout?
Patience is key! Raspberries are slow starters—expect germination in 4–8 weeks under ideal conditions (warmth, moisture, and light). Some seeds may take months or never sprout. Keep soil consistently moist and avoid overwatering to prevent mold.
What’s the best time of year to start rooting raspberries?
Spring or early summer is ideal for indoor rooting (60–75°F), while outdoor planting should wait until after the last frost (zones 5–9). If you start in winter, use a grow light to supplement weak sunlight. Pro tip: Label your seeds—raspberry seedlings can look like weeds!
Why aren’t my raspberry seeds germinating?
Common culprits include:
- Cold soil: Raspberries need warmth (70°F+). Use a heat mat if needed.
- Old seeds: Freshness matters—save seeds from ripe fruit immediately.
- Over/under-watering: Keep soil damp (not soggy) to avoid damping-off.
- Poor light: Weak seedlings? Move them to brighter light ASAP.
Can I grow raspberries in containers?
Containers (12"+ deep) work great for raspberries, especially summer-bearing varieties. Use well-draining soil, a trellis for support, and ensure the pot has drainage holes. Dwarf varieties like ‘Heritage’ thrive in pots, while larger types need bigger space (5+ gallons).
Wrapping up and next steps
Growing raspberries from fruit is a rewarding journey that combines patience with the joy of nurturing life from something as simple as a seed!
With the right tools—like a warm spot, patience, and a little creativity—you’ve got everything you need to cultivate thriving vines. Remember: consistency is key, whether you’re sprouting seeds, transplanting seedlings, or tending to your first berries.
Now that you’re armed with these rooting secrets, why not take the next step? Share your progress with fellow gardeners, experiment with different raspberry varieties, or even expand your garden with new plants. Your green thumb is about to get even greener—happy growing! 🌱✨