
Pests and Diseases
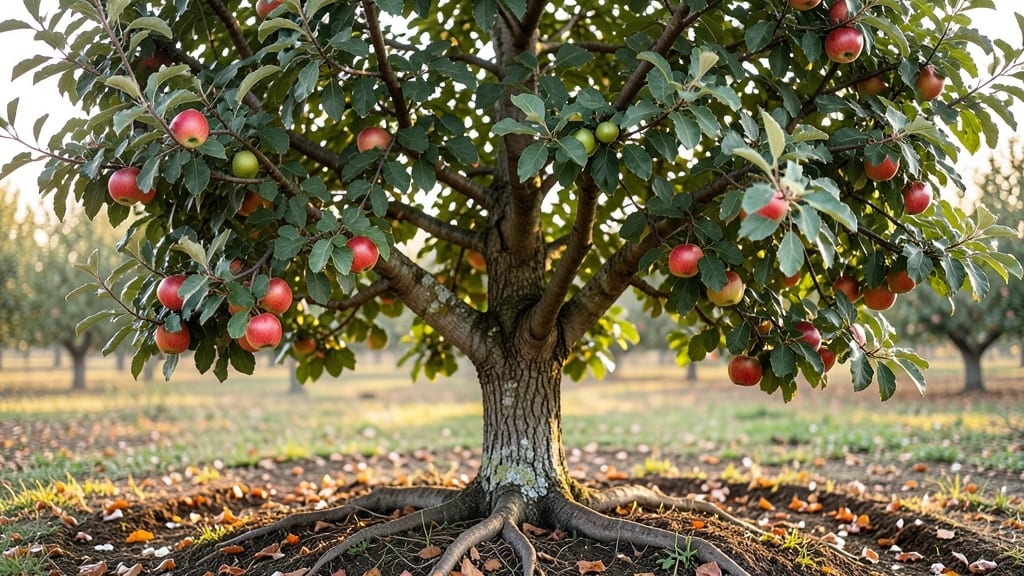
Understanding leaves, roots, and fruits transforms how you grow plants. 🌱 I’ve learned that each part has a unique job—roots anchor and feed, leaves breathe and make food, and fruits store energy for next season. These secrets are what separate struggling plants from thriving ones in my garden.
Start by giving roots well-draining soil and consistent moisture—they’re the foundation. Leaves need pruning for airflow and sunlight to photosynthesize, while fruits require support and proper harvesting timing to mature.
Skip these basics, and you’ll end up with weak growth or poor yields—something I’ve seen too often in my own garden.
📚 In This Guide
- What you need
- Instructions
- Tips and common mistakes
- Wrapping up and next steps
What you need
- ● Hand Lens or Magnifying Glass – A 10x magnification lens for close-up inspection of leaves, roots, and fruits.
- ● Pruning Shears – Sharp, sterilized shears for safely trimming infected or damaged plant parts.
- ● Gloves (Nitrile or Latex) – Protects hands from sap, soil, and pests.
- ● Spray Bottle (8–16 oz) – For applying homemade remedies like neem oil or soapy water.
- ● pH Test Kit – Helps assess soil health (roots thrive in 6.0–7.0 pH for most plants).
- ● Notebook & Pen – Track symptoms, treatments, and progress over time.
- ● Digital Camera – Capture close-ups of symptoms for later reference.
- ● Soil Moisture Meter – Over/under-watering can stress plants and invite pests.
- ● Beneficial Insects (Ladybugs, Lacewings) – Natural predators for common leaf pests.
- ● Compost or Organic Fertilizer – Boosts root and fruit health if deficiencies are spotted.
- ● Labeling Tape & Markers – Tag plants to monitor specific treatments.
Understanding plant growth: how leaves, roots, and fruits work together
Healthy plants thrive when you grasp how their three core systems—leaves, roots, and fruits—collaborate. Here’s how to nurture each for maximum vitality.
🌿 Step 1: Maximize Leaf Efficiency for Energy Production
Leaves are the powerhouses of photosynthesis, converting sunlight into energy. To optimize their function, ensure they receive 6-8 hours of direct sunlight daily—adjust placement if you notice pale or elongated leaves, a sign of light deprivation. Variegated plants need slightly more light to balance their chlorophyll-deficient areas.
Prune leaves strategically by removing yellowed or damaged ones, which divert energy away from growth. Focus on maintaining a balanced canopy—too many leaves can shade lower branches, reducing overall light absorption. Dust leaves occasionally with a damp cloth; a layer of dust blocks 10-20% of sunlight, weakening photosynthesis.
🌱 Step 2: Cultivate Strong Roots for Nutrient Uptake
Roots anchor plants and absorb water and nutrients, so prioritize well-draining, aerated soil. Amend heavy clay with 20% perlite or compost to improve oxygen flow—roots suffocate in compacted soil, leading to stunted growth. Water deeply but infrequently; roots develop deeper when they search for moisture, making plants more drought-resistant.
Mulch around the base with 2-3 inches of organic material (like shredded bark) to regulate soil temperature and retain moisture. Avoid piling mulch against the stem, as this can trap excess dampness and invite rot. Healthy roots produce fine, white root hairs—if yours are brown or mushy, overwatering is likely the culprit.
🍎 Step 3: Support Fruit Development with Balanced Care
Fruits demand extra energy, so prioritize high-potassium fertilizers (like banana peel tea or compost) during flowering and fruiting stages. Prune excess flowers if the plant struggles—overloading it with blooms weakens fruit quality. Thin fruits early to 6-8 inches apart (for tomatoes, peppers, etc.) to prevent competition for nutrients.
Watch for signs of stress: fruits dropping prematurely often indicate underwatering or nutrient deficiencies, while cracked skins suggest inconsistent moisture. Harvest at peak ripeness—tomatoes should yield slightly to gentle pressure, and berries should detach easily when ready.
⏰ Step 4: Synchronize Growth Phases for Long-Term Health
Plants cycle through growth stages—focus on leaf expansion in spring, root strengthening in summer, and fruit maturation in late summer/fall. Adjust care accordingly: fertilize leaves heavily in spring, prioritize watering roots during droughts, and reduce stress on fruiting plants by avoiding heavy pruning.
Rotate crops annually to prevent soil depletion and disease buildup. Observe your plants’ rhythms—some, like citrus, bear fruit year-round, while others (like peaches) need a dormant period. Mimic natural cycles by adjusting light, water, and nutrients seasonally for consistent productivity.
Tips & tricks for healthy plant growth
Between us, these secrets will help you cultivate thriving plants that look like they belong in a botanical garden. The devil is in the details—and I’m about to share them.
Light Optimization: While the 6-8 hours of direct sunlight rule is solid, don’t assume every window is equal. South-facing windows get the most intense light, but east-facing windows provide gentler morning sun—perfect for delicate plants like ferns. If your plants still look pale after 8 hours, supplement with a grow light for 2-3 hours daily. I’ve seen houseplants go from sad to spectacular with just this extra boost.
Root Health Diagnostic: The fine, white root hairs mentioned in the instructions are your early warning system. If you see brown, black, or mushy roots, it’s a cry for help—not from overwatering alone, but possibly from poor drainage or fungal issues. Try the "finger test": stick your finger 2 inches into the soil. If it’s damp but not soggy, you’re golden. If it’s bone dry, your watering schedule needs adjustment.
Fruit Stress Signals: Those cracked skins on tomatoes or peppers? That’s not just about inconsistent moisture—it’s often a sign of uneven potassium levels. If you notice this, try a foliar spray of diluted liquid seaweed (1 tsp per quart of water) every 2 weeks during fruiting season. It’s like giving your plants a potassium IV drip without the needles.
Seasonal Care Calendar: Don’t treat your plants like they’re on a fixed schedule—they’re living organisms with rhythms. In spring, when leaves are expanding, focus on nitrogen-rich fertilizers. By summer, switch to phosphorus-heavy feeds to encourage root growth. And when fruits start forming, potassium becomes your new best friend. Think of it like adjusting your workout routine based on your goals—what works in January won’t cut it in July.
Pro Tips for Leaves Roots And Fruits
- Between us, these secrets will help you cultivate thriving plants that look like they belong in a botanical garden. T...
- Light Optimization: While the 6-8 hours of direct sunlight rule is solid, don’t assume every window is equal. South-f...
- Root Health Diagnostic: The fine, white root hairs mentioned in the instructions are your early warning system. If yo...
Frequently asked questions
Got questions about keeping your plants thriving with their leaves, roots, and fruits? You’re in the right place! Here are answers to the most common concerns—from pests to harvest tips—so you can grow like a pro.
How do I protect my plant’s leaves from pests without harming them?
Use neem oil or insecticidal soap for soft-bodied pests like aphids or spider mites—spray early in the morning to avoid burning leaves. For tougher critters, introduce beneficial insects like ladybugs. Always test sprays on a small leaf first! Pro tip: Prune damaged leaves to redirect energy to healthy growth.
Why are my plant’s roots rotting, even with good drainage?
Root rot often sneaks in from overwatering or poor soil aeration. Let the top 1–2 inches of soil dry out between waterings, and mix in perlite or sand for better airflow. If rot’s already set in, trim the black/mushy roots and repot in fresh, sterile soil. Watch for: Wilting despite dry soil—a red flag!
Can I eat fruits/veggies from my homegrown plants if pests were present?
Most pests (like aphids) leave behind harmless residue, but soft fruits (berries, tomatoes) should be washed thoroughly. For hard-skinned produce (squash, peppers), scrubbing with a brush removes 90% of contaminants. When in doubt, peel or cook—heat kills many pathogens. Bonus: Companion planting (e.g., basil with tomatoes) deters pests naturally!
How long does it take for roots to establish after transplanting?
Root establishment varies by plant: Herbs and greens (2–4 weeks), shrubs/trees (3–6 months), and deep-rooted veggies (like carrots) can take up to a year. Keep soil moist (not soggy) and avoid fertilizing for 2 weeks post-transplant. Signs of success: New leaves and firm stems!
What’s a quick fix for yellowing leaves if my plant looks otherwise healthy?
Yellow leaves often mean overwatering or nutrient deficiency. Flush the soil with water to check for salt buildup, then adjust your routine. Feed with a balanced fertilizer (like 10-10-10) or a chelated iron supplement for chlorosis. Prevent future issues: Water at the base, not the leaves!
| Issue | Quick Check | Solution |
|---|---|---|
| Stunted growth | Check soil pH (ideal: 6.0–7.0) | Amend with lime (raise pH) or sulfur (lower pH) |
| Fruits dropping early | Look for blossom end rot (calcium deficiency) | Add crushed eggshells or calcium nitrate to soil |
Wrapping up and next steps
Understanding the leaves, roots, and fruits of your plants is the key to unlocking their full potential—and keeping pests and diseases at bay! 🌱 From diagnosing issues early to nurturing every part of the plant, you now have the tools to foster thriving, resilient greenery.
Whether it’s pruning for better airflow or choosing disease-resistant varieties, your green thumb is about to get a major upgrade.
Ready to put your newfound knowledge into action? Start by auditing your garden or indoor plants—check those leaves, roots, and fruits for signs of stress or trouble. Then, pick one tip from this guide to implement this week. Small steps lead to big, lush results! 🌟