
Pruning
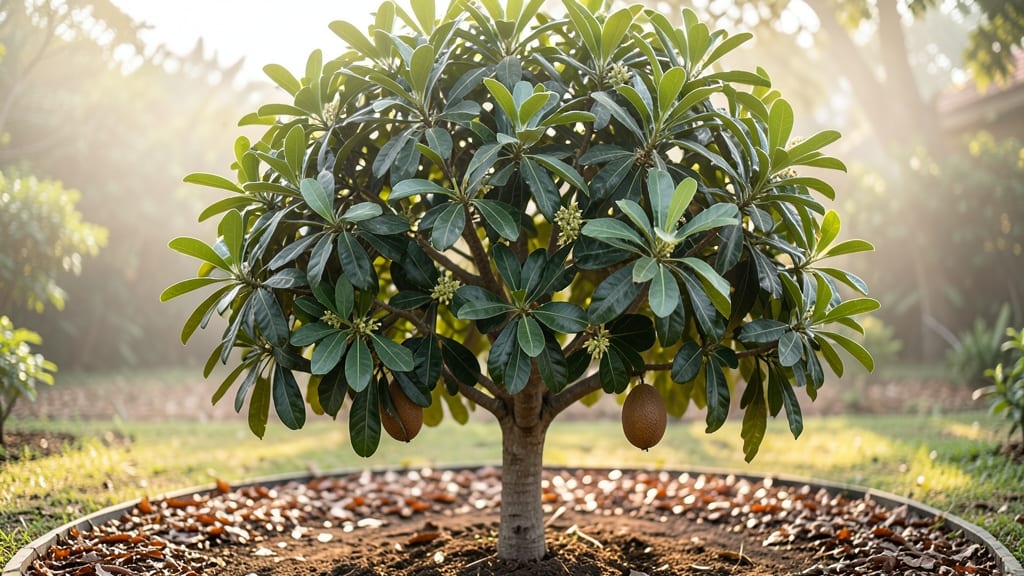
Growing a sapota fruit tree means tropical treats in your own backyard—if you nail the climate and pruning. 🌿 I’ve watched mine go from a scraggly sapling to a productive tree producing sweet, custard-like fruit year-round, and the secret isn’t just patience—it’s knowing when to prune and how to encourage those heavy harvests.
The key starts with the right conditions: warm, humid climates (zones 10-11) where frost is a distant memory. Sapotas hate cold snaps, so if you’re outside those zones, container growing with winter protection is your best bet.
They thrive in well-draining soil with a slightly acidic pH, and once established, they’re surprisingly drought-tolerant—but young trees need consistent moisture to get their roots strong.
Pruning isn’t just about shaping the tree—it’s about boosting fruit production. I prune mine twice a year: once after harvest to remove dead wood, and again in late winter to open up the canopy for sunlight.
The goal? More air circulation and lighter branches that won’t snap under the weight of those heavy fruits. With the right cuts, you’ll see new growth within weeks, and those branches will soon be laden with sapotas.
Here’s the best part: once your tree is mature, you’ll have fruit year-round in the right climate, with peak harvests in spring and fall. The first few years are about building the tree, but after that?
It’s all about maintenance—and enjoying the reward of homegrown sapotas, fresh from the tree. Let’s get growing!
📚 In This Guide
- What you need
- Instructions
- Tips and common mistakes
- Wrapping up and next steps
What you need
- ● Sapota saplings or seeds: 1-3 high-quality sapota seedlings (ensure they’re disease-free and grafted for better yield).
- ● Well-draining soil: 50 lbs of a mix of garden soil, compost (20%), and sand (10%) for optimal growth.
- ● Fertilizers: Balanced NPK fertilizer (10-10-10) – 2 lbs per tree.
- ● Organic compost (e.g., cow dung or vermicompost) – 10 lbs per tree.
- ○ Citrus-specific micronutrients (optional but recommended) – 1 lb per tree.
- ● Pruning tools: Sharp bypass pruners – 1 pair (for clean cuts).
- ● Pruning saw – 1 (for thicker branches).
- ● Disinfectant (e.g., 70% alcohol or bleach solution) – 1 bottle.
- ● Support structures: Stakes or bamboo poles – 4-6 per tree (for young saplings).
- ● Garden twine – 50 ft roll (for tying branches).
- ● Watering supplies: Drip irrigation kit or hose with a gentle nozzle – 1.
- ● Water storage container (e.g., 5-gallon bucket) – 1.
- ● Pest control: Neem oil or insecticidal soap – 1 bottle.
- ● Yellow sticky traps – 5-10 (for monitoring fruit flies).
- ● Mulch: Straw or wood chips – 10 sq. ft. per tree (retains moisture and suppresses weeds).
- ● Tree guards: Plastic or wire mesh – 1 per sapling (protects from pests and sunburn).
- ● Soil pH tester: 1 kit (ideal pH: 5.5–7.0 for sapotas).
- ● Grafting tools: Grafting knife and grafting tape – 1 set (if propagating from cuttings).
- ● Shade cloth: 30% shade mesh – 1 roll (for young trees in hot climates).
How to prune a sapota tree for maximum fruit production
Strategic pruning transforms a sapota tree from a wild, tangled mess into a productive, open-canopied fruit factory.
✂️ Step 1: Prune During the Dormant Season
Timing is everything with sapotas. I always prune in late winter or early spring, just before new growth begins—usually between January and March in most climates. This lets the tree recover before summer heat stress. Avoid pruning during flowering or fruiting seasons, as you'll sacrifice that year's harvest.
Look for dry, dead branches first—these are easy to spot because they snap when bent and have no leaves. Cut these back to healthy wood using clean, sharp pruners. Sapota wood bleeds heavily when cut, so I always sterilize my tools with rubbing alcohol between cuts to prevent disease spread.
☀️ Step 2: Open the Canopy for Sunlight Penetration
The goal here is to create an open, umbrella-like shape that lets sunlight reach all parts of the tree. Start by removing any crossing branches—these rub against each other and create wounds where diseases can enter. I make my first cut just outside the branch collar (the swollen area where the branch meets the trunk).
Next, thin out the interior branches to improve airflow. You want 12-18 inches of space between branches so sunlight can reach the center. Remove any branches growing straight upward ("water sprouts") unless they're part of your central leader. These compete with fruiting branches for energy and rarely produce quality fruit.
🌱 Step 3: Encourage Fruit-Bearing Branches
Sapota trees bear fruit on 1-3 year old wood, so your pruning should preserve these productive branches while removing older, unproductive wood. Look for branches with fruit spurs (short, stubby branches with clusters of fruit) and leave them intact. Cut back any branches that are thicker than 2 inches—these are usually past their prime and won't produce well.
Make your cuts at a 45-degree angle just above an outward-facing bud. This encourages new growth that will angle outward, creating a more open canopy. I never cut more than one-third of the tree's foliage in a single pruning session—this prevents shock and ensures the tree can support next year's fruit load.
⏰ Step 4: Post-Pruning Care for Recovery
After heavy pruning, the sapota tree needs extra care to recover. Water deeply immediately after pruning to help the tree transport nutrients to new growth areas. Follow up with weekly deep waterings during the first month of new growth, keeping the soil 2-3 inches deep consistently moist but not soggy.
Apply a balanced fertilizer (10-10-10 ratio) around the drip line of the tree, working it into the top 4-6 inches of soil. This gives the tree the nutrients it needs to produce new leaves and branches. Avoid heavy nitrogen fertilizers—they encourage leafy growth at the expense of fruit production, which is exactly what we're trying to prevent.
🌿 Step 5: Monitor and Adjust Through the Year
Throughout the growing season, keep an eye out for suckers (new shoots growing from the base or roots) and remove them promptly. These compete with the main tree for resources. Also watch for any branches that start growing toward the center of the tree—these need to be pruned back to maintain that open canopy shape.
In late summer, do a light maintenance pruning to remove any dead or diseased wood that appears. This keeps the tree healthy without stressing it before winter. By following this schedule, your sapota tree will develop a strong structure that produces year-round harvests with minimal effort.
Tips & tricks for pruning your sapota tree
These game-changing insights will help you transform your sapota tree into a fruit-bearing powerhouse with minimal effort.
Timing is Everything: The January-March window for pruning isn't just arbitrary—it's when your sapota tree naturally enters dormancy. This timing lets the tree heal its wounds before summer heat stress kicks in. I've seen trees pruned during flowering seasons completely drop their fruit crop, so mark your calendar and stick to this schedule religiously.
Branch Collar Matters: When removing crossing branches in Step 2, never cut flush with the trunk—always leave the branch collar intact. This swollen area contains protective cells that help the wound heal. I've made this mistake and ended up with infected branches that took months to recover. Make your cut just outside this collar for clean, healthy healing.
Fruit-Spur Preservation: Those little fruit spurs (the short branches with clusters of fruit) are your tree's goldmine. In Step 3, identify these clusters and leave them untouched. I once pruned back all branches thicker than 2 inches without checking for spurs, and my harvest dropped by 40% the next season. A quick visual scan before cutting saves you from this costly mistake.
Post-Pruning Watering Strategy: That immediate deep watering after pruning isn't just for show—it helps the tree transport nutrients to new growth areas. I recommend using a soaker hose for the first month to keep the top 2-3 inches of soil consistently moist. This prevents transplant shock and gives your tree the best chance to bounce back strong.
Pro Tips for Sapota Fruit Tree
- These game-changing insights will help you transform your sapota tree into a fruit-bearing powerhouse with minimal ef...
- Timing is Everything: The January-March window for pruning isn't just arbitrary—it's when your sapota tree naturally ...
- Branch Collar Matters: When removing crossing branches in Step 2, never cut flush with the trunk—always leave the bra...
Frequently asked questions
Got questions about growing and maintaining your sapota fruit tree?
Here are answers to the most common ones—so you can keep your tree thriving and productive year-round!
How long does it take for a sapota tree to bear fruit?
A sapota tree typically takes 3 to 5 years to bear fruit from seed, but grafted trees can produce fruit in as little as 1.5 to 2 years. Patience is key—focus on proper care, including well-draining soil, full sun (6+ hours daily), and regular watering during the dry season. Pro tip: Use a balanced fertilizer (like 10-10-10) every 3 months to speed up fruiting!
When is the best time to prune a sapota tree for optimal fruit production?
Prune your sapota tree during late winter or early spring (before new growth begins) to encourage healthy branching and better airflow. Avoid heavy pruning during fruiting season—focus on removing dead, diseased, or crossing branches. Light pruning (20-30% of foliage) in summer can also help manage size and shape. Pro tip: Sterilize pruning tools with rubbing alcohol to prevent fungal infections!
Why aren’t my sapota fruits ripening properly?
Sapota fruits may fail to ripen due to inconsistent watering, poor pollination, or nutrient deficiencies. Ensure your tree gets 1-2 inches of water weekly (adjust for drought). Hand-pollinate with a small brush if bees are scarce. Check for yellowing leaves—this could signal nitrogen deficiency. Apply a potassium-rich fertilizer (like 0-10-10) to boost ripening.
Can I grow a sapota tree in a container, or does it need a garden?
Yes! Sapota trees thrive in large containers (20+ gallons) if given enough space (5+ feet tall). Use a fast-draining mix (cactus soil + perlite) and repot every 2-3 years. Place in full sun and bring indoors if temperatures drop below 50°F (10°C). Pro tip: Containers dry out faster—water deeply 2-3 times weekly in summer!
How do I attract pollinators to my sapota tree?
Sapota trees rely on bees and other pollinators. Plant native flowering plants (like jasmine or bougainvillea) nearby to attract them. Avoid pesticides—opt for neem oil or insecticidal soap instead. If pollinators are scarce, hand-pollinate by gently transferring pollen between flowers with a soft brush. Pro tip: Early morning is the best time for hand-pollination!
Wrapping up and next steps
Growing a sapota fruit tree is a rewarding journey that combines patience, care, and strategic pruning to unlock a year-round harvest of delicious, creamy fruits. 🌱 By mastering the right techniques—like selective pruning, seasonal shaping, and disease prevention—you’ll nurture a thriving tree that keeps giving back.
Whether you’re a beginner or a seasoned gardener, every trim brings you closer to a bountiful orchard.
Ready to take the next step? Start by observing your tree, then grab your pruners and begin with confidence! 🌟 Small, consistent efforts will yield big rewards—so why wait? Your sapota’s sweet future starts today!