
Propagation
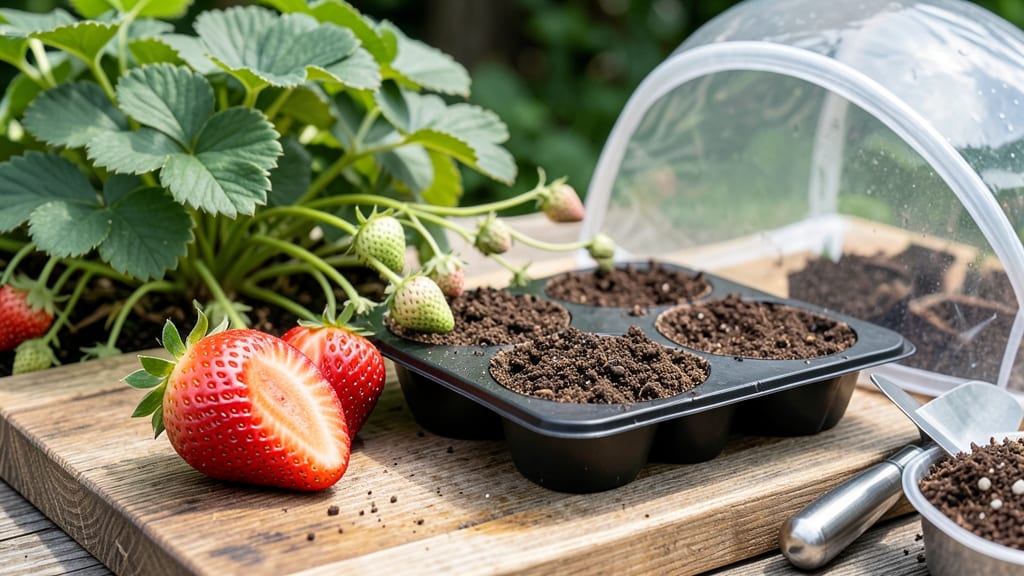
Growing strawberries from fruit lets you turn grocery-store scraps into homegrown plants—no nursery needed. 🌱 The process starts with a ripe strawberry and a glass of water, and within weeks, you'll see tiny sprouts pushing through the seeds.
It's slower than buying plants, but the satisfaction of growing from seed is unmatched.
You only need a few simple supplies: ripe strawberries, a shallow container, water, and patience. The key is keeping seeds moist but not soggy while they germinate. Most seeds sprout within 7-14 days, though some take longer—don't rush them.
Once they're big enough to handle, you'll transplant them into soil where they'll grow into full plants.
By summer, your seedlings will develop true leaves and be ready for their permanent home in the garden. They'll need consistent watering and protection from pests, but the payoff is worth it—homegrown strawberries with deep flavor and fewer chemicals.
The first fruits might take a year, but each season after that, you'll have a bountiful harvest.
This method works year-round indoors with a grow light, or you can start them early in spring for outdoor planting. Whether you're growing in pots or garden beds, the process is forgiving—just keep the seeds moist and give them time. Here's how to get started without the guesswork.
📚 In This Guide
- What you need
- Instructions
- Tips and common mistakes
- Wrapping up and next steps
What you need
- ● Fresh strawberries: 3–5 ripe, organic strawberries (preferably with green leafy tops still attached for best results).
- ● Water: Distilled or filtered water (1 cup) for the initial soaking/sprouting phase.
- ● Container for sprouting: Option 1: A shallow dish (e.g., saucer or small plate) with a mesh screen or paper towels.
- ● Option 2: A small glass or jar (for water propagation).
- ● Potting soil: Well-draining, organic potting mix (1–2 gallons, depending on your setup). Look for a blend labeled for vegetables or herbs.
- ● Small pots or trays: 4–6-inch diameter pots (or a seedling tray with individual cells) for transplanting.
- ● Spray bottle: For gentle watering to keep soil moist without oversaturating.
- ● Rooting hormone: A gel or powder to encourage faster root growth (especially useful if your strawberries are slow to sprout).
- ● Grow lights or sunny windowsill: A south-facing window or a small LED grow light (12–16 hours/day) to supplement natural light.
- ● Fertilizer: A balanced, water-soluble fertilizer (e.g., 10-10-10) for when seedlings are 2–3 inches tall.
- ● Mulch or straw: To retain moisture and protect young plants from temperature fluctuations.
- ● Labels and markers: To track planting dates and varieties (if growing multiple types).
Step-by-step instructions for growing strawberries from fruit
Here's how to turn store-bought strawberries into thriving plants in weeks—not months.
🌱 Step 1: Select and Prepare the Fruit
Grab 4 ripe strawberries with green leafy tops still attached—these are your starters. Rinse them gently to remove any dirt or residue, but don’t soak them. The key here is to keep the fruit intact while ensuring the crown (where the leaves meet the fruit) stays dry.
I always pick strawberries with firm, plump fruit and bright green leaves—wilted or yellowing tops won’t sprout. Place them in a shallow dish or plate so the green tops stick up and the fruit rests on the bottom. This keeps moisture off the crown, which is critical for preventing rot.
💧 Step 2: Choose Your Sprouting Method
You’ve got two fast options: water or soil. For water, fill a small container with room-temperature water (about 1 inch deep) and place the strawberries so only the green tops are submerged. Change the water every 2-3 days to keep it fresh—stagnant water breeds bacteria that can kill your sprouts.
For soil, fill a small pot with moist potting mix (not garden soil) and press the strawberries into the top layer so the green crowns peek out. Keep the soil lightly damp—not soggy—and place the pot in a warm, bright spot. I’ve found soil sprouts slightly faster because the roots establish contact with nutrients immediately.
☀️ Step 3: Provide Warmth and Light for Sprouting
Strawberry crowns sprout best in warmth between 70-75°F. If your home runs cooler, place the container near a sunny window or under a grow light for 12-14 hours daily. You’ll see tiny white roots or green shoots emerge in 7-14 days—this is your signal everything’s working.
Don’t move the container once sprouts appear. Even a slight shift can snap delicate new growth. If you’re using water, roots will grow into the liquid first—once they’re ½ inch long, you can transplant them into soil. For soil starters, keep the mix moist but avoid overwatering, which causes crown rot.
🪴 Step 4: Transplant Sprouts for Strong Growth
Once your sprouts have 2-3 inches of root or stem growth, it’s time to move them to individual pots. Use 4-inch diameter containers with drainage holes and fill them with moist potting mix. Dig a small hole, place the sprout in so the crown sits just above the soil line, and gently firm the mix around it.
Water lightly after transplanting—just enough to settle the soil. Place the pots in bright, indirect light for the first week to help them recover. After that, they’ll tolerate full sun (6+ hours daily). This is where patience pays off: strawberries grown from fruit take 4-6 weeks to establish strong roots before they’re ready for the garden.
✂️ Step 5: Care for Mature Plants and Harvest
Once your strawberries have 4-6 true leaves (not just the initial sprouts), they’re ready for outdoor planting. Harden them off by placing them outside in partial shade for 1-2 hours daily, gradually increasing their time outdoors over 10-14 days. Plant them in well-draining soil with 6 inches between plants and 12 inches between rows. Mulch with straw or shredded leaves to retain moisture and protect the fruit.
Your first harvest won’t come until next year, but you’ll get small berries on established plants in 8-12 months. The real payoff? These homegrown strawberries taste sweeter and riper than store-bought—plus, you’ll have a perennial patch that keeps producing for years. Here’s the thing—once you try this, you’ll never buy strawberries again.
Tips & tricks for fast strawberry sprouting success
These little tricks will help you turn those grocery store strawberries into thriving plants in record time—no green thumb required.
Selection is Everything: Here's what nobody tells you—those tiny strawberries with extra-large green tops are your golden tickets. Look for crowns that are plump, firm, and still attached to the fruit. I’ve tried wilted tops, and they just won’t cooperate. The key is to pick strawberries that feel heavy for their size, which means they’re packed with moisture and ready to sprout.
Water vs. Soil Showdown: While both methods work, I’ve found soil sprouts about 3-5 days faster than water because the roots get immediate access to nutrients. If you’re impatient (and who isn’t?), skip the water method entirely. For soil starters, press the crowns just ½ inch deep—any deeper and you’ll smother the emerging shoots. The goal is to keep that crown exposed while the roots establish.
Light and Temperature Teamwork: That 70-75°F range isn’t just a suggestion—it’s where strawberry crowns get their groove on. If your home runs cooler, place your setup on top of the fridge or near a sunny window. For the 12-14 hours of light, I use a simple LED grow light on a timer—it’s the difference between eager sprouts and stubborn stalemates. Pro move: Angle the light so it’s not directly overhead, which prevents the delicate shoots from stretching too tall too fast.
Transplanting Without Trauma: When your sprouts hit 2-3 inches, don’t rush the transplant. Gently tease apart any tangled roots and handle them like they’re made of glass—because they are. I’ve learned the hard way that rough handling snaps those fragile stems. After planting, give the soil a light mist with water to settle it around the roots, then let nature take over. The first week in indirect light is crucial for recovery before you crank up the sun.
Pro Tips for Grow Strawberries From Fruit
- These little tricks will help you turn those grocery store strawberries into thriving plants in record time—no green ...
- Selection is Everything: Here's what nobody tells you—those tiny strawberries with extra-large green tops are your go...
- Water vs. Soil Showdown: While both methods work, I’ve found soil sprouts about 3-5 days faster than water because th...
Frequently asked questions
Got questions about growing strawberries from fruit?
You’re not alone—this method is fun but can feel tricky at first! Below, we’ve rounded up the most common questions (and answers) to help you succeed without the guesswork.
Can I grow strawberries from any store-bought fruit?
Not all strawberries work! Choose organic, pesticide-free berries with firm, plump fruit and healthy green leaves. Conventional store-bought strawberries often have wax coatings or treatments that inhibit sprouting. Skip the mushy or moldy ones—they won’t root well.
How long does it take for strawberry seeds to sprout?
Patience is key! In water, seeds may sprout in 7–21 days, while soil-grown seeds can take 14–30 days. Keep the medium moist (not soggy) and warm (65–75°F). If nothing happens after 4 weeks, try a fresh batch—some seeds just need more time or better conditions.
Why are my strawberry cuttings rotting in water?
Overwatering or bacteria are usually the culprits. Use room-temperature water (change it every 2–3 days) and ensure only the base of the stem touches the water. Add a drop of hydrogen peroxide (3%) to prevent mold. If leaves turn yellow or the stem softens, it’s rotting—start over with fresh cuttings!
Can I transplant water-sprouted strawberries directly into soil?
Yes! Once roots reach 1–2 inches long, gently transfer your sprouts to pots or garden beds. Bury the stem halfway, keeping the leaves above soil. Harden off seedlings by placing them outside for a few hours daily before full transplantation. Avoid direct sun at first to reduce shock.
Will homegrown strawberries taste as good as store-bought?
Absolutely—better! Homegrown strawberries ripen in the sun, packing more flavor, sweetness, and nutrients. Store-bought berries are often picked early for shipping, while yours can mature fully on the vine. Plus, no wax or preservatives—just pure, juicy goodness!
What’s the fastest way to get fruit from my sprouted strawberries?
Rush doesn’t work with strawberries, but you can speed up fruiting by:
- Planting in full sun (6+ hours/day).
- Using balanced fertilizer (10-10-10) when flowers appear.
- Pruning old leaves to redirect energy to fruit production.
- Choosing everbearing or day-neutral varieties (like ‘Albion’ or ‘Seascape’).
First fruit may take 6–12 months, but it’s worth the wait!
Wrapping up and next steps
Growing strawberries from fruit is a rewarding and simple process—whether you’re a gardening novice or a seasoned green thumb! 🌱 With just a few supplies and patience, you can turn store-bought berries into thriving plants ready for your garden or containers.
The key is consistency: keep your runners moist, provide the right light, and soon you’ll be harvesting sweet, homegrown strawberries.
Now that you’ve mastered the basics, why not take the next step? Experiment with different varieties, try growing in hanging baskets, or even share your newfound knowledge with friends. Happy growing—your future strawberry harvest is just around the corner! 🍓✨