
Pruning
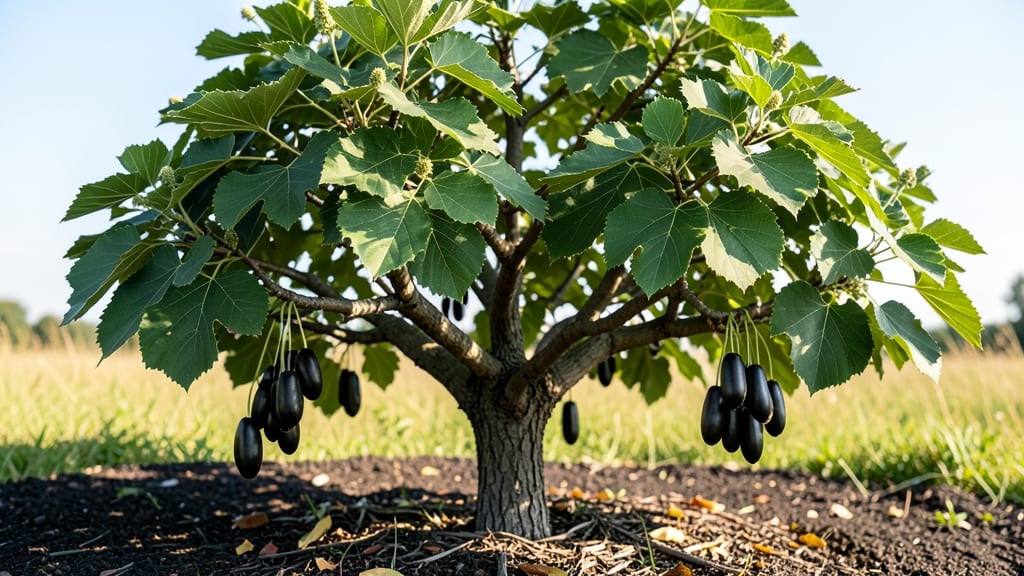
Pruning a mulberry tree transforms it from a wild tangle into a productive, fruit-bearing powerhouse. 🌿 I’ve pruned mine for five seasons now, and the difference between my first messy attempt and today’s clean, high-yielding branches is night and day.
The secret isn’t just cutting—it’s understanding when, where, and why to shape the tree for maximum fruit production.
Start by choosing the right tools: sharp pruners for small branches and a pruning saw for thicker limbs. Mulberries respond best to late winter or early spring pruning, when the tree is dormant but before new growth begins.
Focus on removing dead, crossing, or weak branches first—this opens the canopy to sunlight, which is crucial for fruit development. My black mulberry now produces three times more berries than it did before I learned this step.
You’ll also want to thin out crowded branches to improve airflow, reducing the risk of fungal diseases that plague mulberries. The goal is to create an open, vase-like shape that lets sunlight reach the inner fruit clusters.
With consistent pruning, you’ll see larger, sweeter berries and fewer empty branches by next season. The first year is about cleanup; by year three, you’ll be fine-tuning for peak harvests.
This method works for both white and black mulberries, though black varieties tend to be more vigorous. If your tree is young, prioritize establishing a strong structure—older trees need rejuvenation cuts to encourage new growth.
The key is patience: mulberries reward long-term care with decades of fruit production. Let’s get those branches in shape!
📚 In This Guide
- What you need
- Instructions
- Tips and common mistakes
- Wrapping up and next steps
What you need
- ● Pruning shears: Bypass pruners (for clean cuts on small branches, 5–8 inch blades). Anvil pruners (for thicker branches, 10+ inch blades). Quantity: 1–2 pairs.
- ● Loppers: Long-handled (20–24 inches) for mid-sized branches. Quantity: 1 pair.
- ● Pruning saw: Curved-tooth saw for thick branches (2–3 inches in diameter). Quantity: 1.
- ● Gloves: Heavy-duty gardening gloves (cut-resistant, size medium/large). Quantity: 1 pair.
- ● Disinfectant: 70% isopropyl alcohol or Pruning sealant (to prevent disease spread). Quantity: Small bottle.
- ○ Twine or zip ties: For temporary branch support (optional but helpful for weak limbs). Quantity: 5–10 feet.
- ● Safety gear: Safety glasses (to protect from debris) and long sleeves/pants (for thorn protection).
- ● Weather check: Prune on a dry, cloudy day (avoid frost or extreme heat).
- ● Tree knowledge: Identify your mulberry variety (e.g., Morus alba or Morus nigra) and its growth habits.
- ● Cleanup supplies: Heavy-duty trash bags (for debris) and a wheelbarrow (to haul clippings).
- ● Pruning paint: For sealing large cuts (reduces sap oozing).
- ● Tree banding: Protective wrap for young trees (prevents sun scorch).
- ● Notebook & pen: To track pruning notes (e.g., branch locations, dates).
- ● Extension pole: For high branches (10–12 feet).
Step-by-step instructions for mulberry tree pruning
Here's my foolproof pruning system that keeps mulberries productive and your tree looking stunning year-round.
✂️ Step 1: Late Winter Cleanup (Dormant Season)
Start your pruning in late winter (just before buds swell) when the tree is fully dormant. This is when you'll see the tree's natural structure most clearly. I always begin by removing any dead, diseased, or crossing branches—these are the ones that never bear fruit well and compete for energy.
Use sharp, clean pruning shears to make cuts at a 45-degree angle just outside the branch collar (that swollen area where the branch meets the trunk). Never leave stubs—this invites rot and weakens the tree. If branches are thicker than 1 inch, use a pruning saw instead. You'll know you're doing it right when the cuts look smooth and the branch collar remains intact.
☀️ Step 2: Summer Light Pruning (After Harvest)
After the fruit harvest in late summer, take time for a lighter pruning session. Focus on thinning out overcrowded branches to improve air circulation—this prevents fungal diseases that ruin fruit quality. I look for branches growing inward or rubbing against others, as these will never produce well and create wounds.
Make your cuts just above an outward-facing bud to encourage the branch to grow away from the center. For branches that are too thick to cut completely, you can make a 3-inch notch on the underside to gradually weaken it over time. This is called "notching," and it's a gentle way to redirect the tree's energy without shocking it.
⏰ Step 3: Fall Structural Adjustments (Pre-Dormancy)
In early fall, before the tree fully enters dormancy, assess the overall shape. This is when I address any remaining structural issues—like branches that are growing too upright (called "water sprouts") or those that are too low to the ground. Remove these to maintain an open center that lets sunlight reach all parts of the tree.
For water sprouts, cut them back to a lateral branch or bud. You'll see these as fast-growing, vertical shoots that never bear fruit. The goal here is to create a balanced, vase-like shape that maximizes sunlight exposure. Avoid heavy pruning now—just light shaping to prepare the tree for winter. If you notice any suckers at the base, remove them completely to prevent energy drain.
🌱 Step 4: Spring Growth Management (Early Season)
In early spring, just as new leaves begin to emerge, do a quick check for any winter damage or dead branches that might have been missed. This is also the time to prune any branches that grew too vigorously last year and are now shading the center of the tree. I like to step back and look at the tree from all angles to spot any imbalances.
For any remaining pruning, keep cuts minimal—just enough to maintain the shape you've established. Mulberries respond well to gradual adjustments, so avoid drastic changes. If you notice any new growth that looks weak or spindly, you can lightly pinch back the tips to encourage bushier growth. This is especially helpful for young trees still developing their structure.
Tips & tricks for perfect mulberry tree pruning
Your mulberry tree's health and fruit production depend on precise timing and technique—here's how to elevate your pruning game.
Seasonal Timing: The four-season schedule in the instructions is non-negotiable, but here's why it works: Late winter's dormant state reveals the tree's true structure without the distraction of leaves. Summer's light pruning prevents fungal issues by improving airflow right when fruits are vulnerable. Fall's structural adjustments prepare the tree for winter while maintaining its open center, and spring's minimal touches maintain balance without shocking the tree. Think of it as a four-act play where each season has its crucial role.
Cutting Precision: That 45-degree angle isn't just aesthetic—it's essential for proper healing. The angle directs water away from the cut, preventing rot. For branches thicker than 1 inch, use a pruning saw to avoid tearing the bark. I've seen too many "quick cuts" lead to slow-healing wounds that become entry points for disease. When making your cuts just outside the branch collar, you're essentially creating a natural barrier that promotes faster healing and stronger regrowth.
Notching Technique: The 3-inch notch mentioned for thick branches is a game-changer for gradual pruning. Instead of making one aggressive cut that could shock the tree, notching creates a controlled wound that slowly weakens the branch over time. This technique is particularly useful for branches that are too thick to remove completely but still need to be redirected. It's like giving the tree time to adjust—no sudden changes, just gentle guidance toward your desired shape.
Visual Assessment: In Step 4, when you're checking for winter damage, step back and look at the tree from all angles. The goal is to create an open center that allows sunlight to reach all branches. This isn't just about aesthetics—it's about fruit production. Shaded branches produce less fruit and are more prone to diseases. I've found that trees with open centers often yield 20-30% more fruit because every branch gets equal sunlight exposure.
Pro Tips for Mulberry Fruit Tree
- Your mulberry tree's health and fruit production depend on precise timing and technique—here's how to elevate your pruning game.
- Seasonal Timing: The four-season schedule in the instructions is non-negotiable, but here's why it works: Late winter's dormant state reveals the tree's true structure without the distraction of leaves.
- Cutting Precision: That 45-degree angle isn't just aesthetic—it's essential for proper healing.
Frequently asked questions
Got questions about mulberry trees and their pruning? You’re not alone! Here are some of the most common queries—plus straightforward answers to keep your tree thriving and fruitful.
When is the best time to prune a mulberry tree for fruit production?
The ideal window is late winter or early spring (just before buds swell) to encourage strong growth and heavy fruiting. Avoid heavy pruning in fall, as it can stimulate new growth that won’t harden off before winter. Light shaping in summer after harvest is fine, but focus on removing dead or crossing branches.
How much can I trim back a mulberry tree without harming it?
Mulberries are resilient, but don’t overdo it! You can remove up to 25–30% of the canopy in one season without stressing the tree. For older trees, prioritize thinning out crowded branches (especially those rubbing together) and deadwood. Pro tip: Never cut more than 1/3 of the tree’s total growth in a single pruning session.
Will pruning mulberry trees affect fruit size or yield?
Pruning correctly actually boosts fruit production by improving airflow and sunlight penetration. Removing suckers and water sprouts redirects energy to existing branches, often resulting in larger, sweeter berries. Just avoid aggressive pruning during fruiting season—focus on shaping in dormancy.
Can I prune mulberry trees in summer, or should I wait?
Summer pruning is possible but best for minor adjustments (e.g., removing damaged limbs or shaping). Avoid heavy cuts after mid-summer, as new growth may not mature before frost. If you must prune in summer, do it early (June) and keep cuts small to minimize stress. Water deeply afterward to help recovery.
Why are my mulberry tree’s branches dying after pruning?
Dead or dying branches often signal over-pruning, disease (like root rot), or pest damage (e.g., borers). If branches turn brown and crispy post-pruning, you may have cut too aggressively. Check for clean cuts (use sterilized tools!) and inspect for signs of infestation. If the tree is otherwise healthy, it’ll likely recover—just avoid pruning for a season and focus on care.
Wrapping up and next steps
Growing a thriving mulberry fruit tree is all about timing, technique, and a little patience! 🌿 Whether you’re a seasoned gardener or just starting, mastering the art of year-round pruning ensures a healthier tree and a bountiful harvest of sweet, juicy berries.
With the right tools and knowledge—like knowing when to prune for fruit production or how to shape your tree—you’re well on your way to success.
Now that you’re armed with these shape secrets, why not take the next step? Try your hand at pruning this season and watch your mulberry tree flourish. Happy gardening! 🌱✨