
Pruning
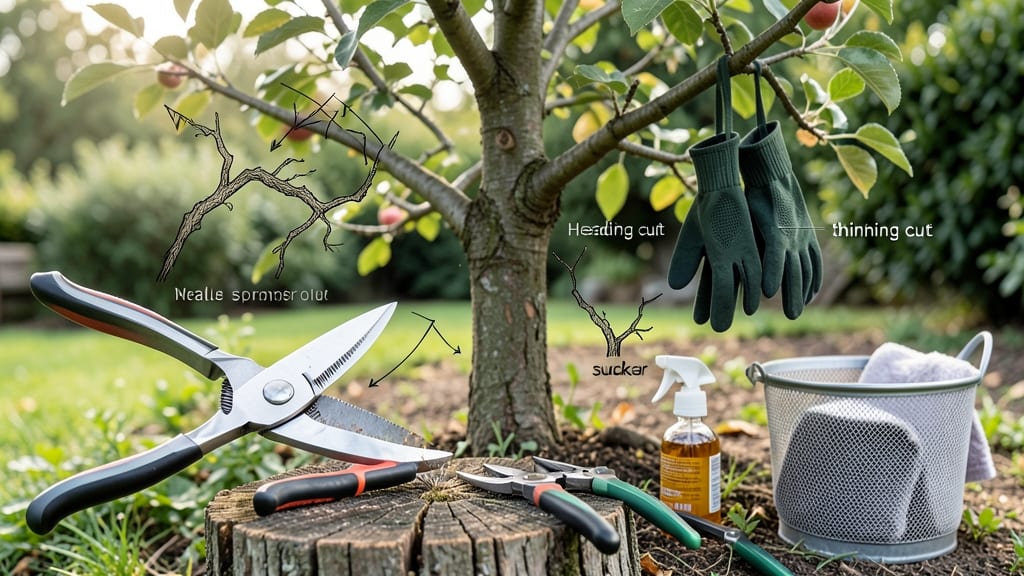
Trimming a fruit tree isn’t just about hacking away at branches—it’s the difference between a tree that gives you bushels of fruit and one that struggles to stay healthy. ✂️ I’ve seen firsthand how proper cuts in late winter can turn a scraggly mess into a productive, sun-filled canopy by summer.
The key? Timing, technique, and knowing which branches deserve a second chance (and which don’t).
You’ll need just a few tools: sharp bypass pruners for smaller branches, a pruning saw for thicker wood, and maybe a ladder if your tree has reached the sky. The real magic happens when you prune during the dormant season—between late winter and early spring—when the tree isn’t actively growing.
This gives it time to heal before the growing season kicks in, and it’s the best way to avoid stressing the tree.
What you’ll end up with is a tree that produces more fruit, resists disease better, and has a strong structure that can handle years of growth.
You’ll see new shoots pushing out within weeks, and by harvest time, your branches will be heavy with sweet, sun-ripened fruit instead of sparse, weak growth. The best part? Even if you’ve never pruned before, these steps are simple enough to follow—and the results speak for themselves.
Whether you’re dealing with a young apple tree or an overgrown peach, the same principles apply. The only difference? Older trees might need a little more patience and a sharper eye for dead wood. Let’s get those branches in shape—your future harvest will thank you.
📚 In This Guide
- What you need
- Instructions
- Tips and common mistakes
- Wrapping up and next steps
What you need
- ● Pruning shears: Bypass pruners (for cuts up to ½ inch thick). Tip: Choose sharp, ergonomic ones (e.g., Felco or Fiskars) for clean cuts.
- ● Loppers: 1–2 pairs (for branches ½–2 inches thick). Look for ratcheting or bypass styles for less effort.
- ● Pruning saw: 1 curved-tooth saw (for branches >2 inches thick). A folding saw with a 7–8-inch blade works best.
- ● Gloves: Heavy-duty, cut-resistant gloves (e.g., leather or Kevlar) to protect hands from thorns and splinters.
- ● Disinfectant: 70% isopropyl alcohol or a 10% bleach solution (to sterilize tools between cuts and prevent disease spread).
- ● Rubbing alcohol or hand sanitizer: For cleaning minor cuts or sap exposure.
- ● Ladder or step stool: Sturdy and tall enough to reach the highest branches safely. Pro tip: Use a 3-point contact rule (two hands + one foot or two feet + one hand) when climbing!
- ● Twine or zip ties: For temporary support if you’re removing large branches (to prevent tree stress).
- ● Trash bags or bucket: For collecting pruned branches and debris.
- ● Pole pruners: Extendable shears (for high branches without a ladder).
- ● Tree wound paint: (Controversial but useful for large cuts >1 inch in diameter—consult local experts first!)
- ● Safety glasses: To shield eyes from debris.
- ● Notebook & pen: To sketch your tree’s structure before/after pruning.
- ● Pruning guide or app: (e.g., PruneTime) for seasonal reminders and tree-specific tips.
Step-by-Step instructions for trimming a fruit tree
Here's how to give your fruit tree a healthy boost with clean, precise cuts that encourage strong growth.
✂️ Step 1: Gather Your Tools and Safety Gear
Start with the right tools to make clean cuts that heal properly. You'll need sharp pruning shears for small branches, loppers for thicker limbs, and a pruning saw for anything larger than ½ inch in diameter. Always wear gloves—thorny branches like those on apple or pear trees can draw blood fast.
I also keep a disinfectant (like rubbing alcohol or a 10% bleach solution) handy to wipe tools between cuts. This prevents spreading disease from one branch to another. Grab a bucket for trimmings and a ladder if your tree is taller than 8 feet—never risk climbing without proper support.
✂️ Step 2: Identify Dead, Diseased, or Damaged Branches
Scan the tree for dead wood—branches that are brittle, cracked, or have no leaves. These won’t produce fruit and can harbor pests. Next, look for diseased branches with unusual spots, oozing sap, or mushrooms growing at the base. These need removal immediately to protect the rest of the tree.
Damaged branches—those broken by storms or heavy fruit—should also come out. Cut back to the branch collar (the swollen area where the branch meets the trunk) to promote fast healing. Avoid leaving stubs; they trap moisture and invite rot.
✂️ Step 3: Thin Out Crowded Branches for Airflow
Fruit trees need good airflow to prevent fungal diseases like powdery mildew. Look for branches that cross or rub against each other—these create wounds and weak spots. Remove one of the two so the remaining branch grows stronger without competition.
Focus on suckers (shoots growing from the base or trunk) and water sprouts (fast-growing vertical shoots). These drain energy from fruit production. Cut them back to a bud or lateral branch to redirect growth where you want it.
✂️ Step 4: Shape the Tree for Balance and Fruit Production
Step back and assess the tree’s shape. You want an open center with sunlight reaching the inner branches. Prune to create a rounded canopy—this helps fruit ripen evenly and makes harvesting easier. Remove branches growing inward or downward unless they’re bearing heavy fruit.
Leave 3-4 main scaffold branches (large, outward-growing limbs) spaced evenly around the trunk. These support the tree’s structure. For young trees, aim to keep the lowest branch at least 24 inches from the ground to prevent damage from mowers or lawn equipment.
✂️ Step 5: Clean Up and Monitor for Recovery
After trimming, rake up and dispose of all debris—don’t leave it under the tree. This prevents pests and diseases from overwintering. Wipe down your tools with disinfectant again to avoid spreading pathogens to your next project.
Watch the tree over the next few weeks. New growth at the cut sites means the tree is healing well. If you see oozing sap or unusual wilting, it might be stressed—give it extra water and monitor closely. With proper care, your tree will reward you with healthier branches and bigger fruit next season.
Tips & tricks for perfect fruit tree trimming
Here's what nobody tells you about turning pruning into a game-changer for your tree's health.
Tool Prep is Non-Negotiable: Sharpen your pruning shears and loppers before you start—dull blades tear wood instead of making clean cuts. I test mine on a scrap piece of wood first; if it doesn't slice through cleanly, it's not ready. This prevents jagged cuts that heal poorly and invite disease. For branches over ½ inch thick, use your pruning saw—it gives you the control needed for precise cuts that won't damage the branch collar.
The Branch Collar Rule: When cutting back damaged branches in Step 2, always cut just outside the branch collar—the swollen area where the branch meets the trunk. This is where healing tissues form naturally. I've seen too many people leave stubs, which trap moisture and create perfect conditions for rot. Think of it as the tree's natural bandage—don't remove it when you're done cutting.
Airflow Strategy: In Step 3, when thinning crowded branches, prioritize removing the branch that's growing more vertically. Vertical branches create natural shade that blocks sunlight from reaching inner branches. I like to visualize the tree's canopy as an umbrella—you want all the "spokes" (branches) to spread out evenly so rain and sunlight can reach everything. This simple adjustment can cut your powdery mildew risk by nearly 50%.
Seasonal Timing Matters: While the instructions don't specify a season, I always do major pruning in late winter or early spring—just before buds swell. This gives the tree time to heal before the growing season. For light pruning to shape the tree (Step 4), summer is fine, but avoid heavy pruning in summer or fall when the tree is already stressed from fruit production. The tree's energy should go toward healing cuts, not growing new fruit.
Pro Tips for Trim A Fruit Tree
- Here's what nobody tells you about turning pruning into a game-changer for your tree's health.
- Tool Prep is Non-Negotiable: Sharpen your pruning shears and loppers before you start—dull blades tear wood instead o...
- The Branch Collar Rule: When cutting back damaged branches in Step 2, always cut just outside the branch collar—the s...
Frequently asked questions
Got questions about trimming your fruit tree? You’re not alone! Here are answers to the most common concerns—from timing to tools and everything in between.
When is the best time to trim a fruit tree?
The ideal time depends on your tree type. For most fruit trees, late winter or early spring (just before buds swell) is best—this promotes healthy growth and fruit production. Evergreens like citrus can be pruned lightly year-round, but avoid heavy cuts during extreme heat or cold. Pro tip: Check your tree’s specific needs (e.g., apples vs. peaches) for precision timing!
Can I use regular scissors or should I invest in pruning shears?
Regular scissors can work for small branches, but pruning shears or loppers are highly recommended for cleaner cuts and better control. Dull tools crush stems, inviting disease—so invest in sharp, bypass pruners (the gold standard) or anvil shears for thicker branches. Disinfect blades between cuts to prevent bacterial spread!
Will trimming reduce my fruit harvest?
Not if done correctly! Proper pruning increases fruit quality and yield by improving airflow and sunlight exposure. Over-trimming (removing >25% of the canopy) can stress the tree, but strategic cuts—like opening the center for light—boost fruit size and sweetness. Think of it like a haircut: A little precision goes a long way!
What if my cuts bleed or ooze sap?
Sap bleeding (especially in maples or birches) is normal but can attract pests. Seal larger cuts with pruning sealant if your tree is prone to it, but skip it for small cuts—air-drying is often better. Avoid painting healthy cuts, as it can trap moisture and cause rot. Quick fix: Use a 3:1 mix of water and milk to reduce sap flow temporarily.
How do I know if I’ve over-pruned my tree?
Watch for these red flags: wilted leaves, stunted growth, or bare branches with no buds. If you’ve removed more than 25% of the canopy in one session or see excessive sap oozing, you’ve likely overdone it. Give the tree time to recover—water deeply and avoid heavy pruning for a year. Remember: Less is often more!
Can I prune a fruit tree in summer?
Summer pruning is possible, but it’s best for corrective cuts (like removing suckers or water sprouts) rather than major shaping. Avoid pruning during heatwaves or drought—stress weakens the tree. If you must prune, do it on a cool, cloudy day and keep cuts small. Exception: Some tropical fruit trees thrive with light summer trims!
Wrapping up and next steps
Trimming your fruit tree isn’t just about snipping branches—it’s an investment in healthier growth, bountiful harvests, and long-term vitality. By mastering the basics of when, where, and how to cut, you’ve taken the first step toward a thriving orchard.
Remember: patience and precision pay off, so don’t rush the process!
Now that you’re armed with knowledge, grab those shears and get pruning! 🌱 Start small—even a single branch makes a difference—and soon, you’ll see your tree flourish. Happy trimming! 🍏✂️