
Pruning
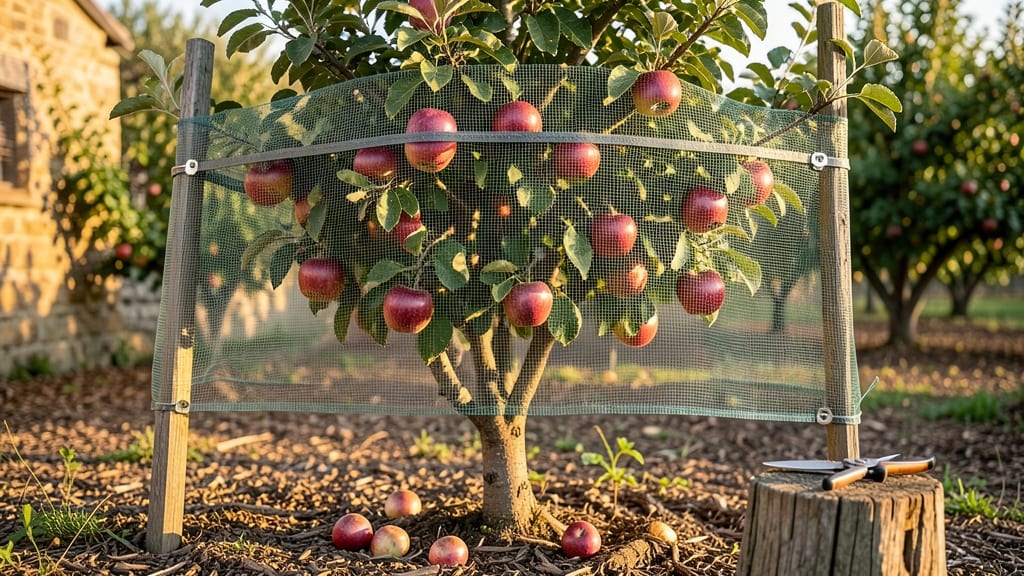
Fruit tree net catchers saved my 2018 peach harvest from being a bird buffet. 🌱 These lightweight but sturdy barriers keep pests from turning your hard work into a snack, while protecting fruit from hail, wind, and even curious critters.
The right net is breathable enough for sunlight and airflow but tight enough to block birds, squirrels, and insects. I learned the hard way that cheap netting tears easily—opt for UV-resistant polyester rated for at least 3mm mesh for small fruits or 5mm for larger ones like apples.
Installation takes 30-60 minutes and involves draping the net loosely over branches, securing it with zip ties or clips without strangling the tree. The key is adjusting for wind and seasonal growth so it doesn’t snag or collapse.
For smaller harvests, consider individual fruit bags instead—they’re easier to handle but require more time. Either way, you’ll end up with clean, blemish-free fruit that stays on the tree until you’re ready to pick.
📚 In This Guide
- What you need
- Instructions
- Tips and common mistakes
- Wrapping up and next steps
What you need
- ● Netting: 1 roll of fine-mesh fruit tree netting (1.5–2.5 mm mesh size, UV-resistant, and durable). Choose a width of at least 10–12 feet to cover most trees.
- ● Measuring tape: 1 (for precise sizing).
- ● Scissors or utility knife: 1 (for cutting netting).
- ● Zip ties or heavy-duty clips: 50+ (to secure netting to branches and stakes).
- ● Wooden or metal stakes: 4–6 (6–8 feet tall, spaced evenly around the tree).
- ● Twine or bungee cords: 1 roll (for extra reinforcement).
- ● Work gloves: 1 pair (to protect hands from thorns and rough edges).
- ● T-posts or rebar: For extra stability in windy areas.
- ● PVC pipes: To create a frame for larger trees.
- ● Spray adhesive: For securing netting to tree trunks (if needed).
- ● Label markers: To track planting seasons or pest activity.
Step-by-step guide to installing fruit tree net catchers
Here's how to set up protective netting that keeps pests out while letting your fruit grow unimpeded.
🌱 Step 1: Choose the Right Net and Measure Your Tree
Select a fine-mesh fruit tree net with openings smaller than ½ inch—this blocks most pests while allowing sunlight and airflow. Measure your tree's canopy width and height at its widest point. I like to add 2 feet extra to each dimension to ensure full coverage, especially if branches spread unevenly.
For standard orchard trees, a 10x12-foot net typically works for a 4-foot-tall tree with a 6-foot spread. Mark the center of your tree's canopy with a flag or stake to use as your anchor point when draping the net. This ensures even coverage and prevents gaps where pests could sneak in.
🪴 Step 2: Install Support Frame or Hanger System
If your net comes with a hoop or frame system, assemble it around the tree, positioning the frame 6-12 inches outside the canopy edges. For trees with spread-out branches, use T-posts or stakes at each corner of the frame to secure stability. If using a hanging net, attach heavy-duty hooks or clips to the tree trunk or a nearby sturdy post.
I always double-check that the frame isn’t touching the tree—1-2 inches of space prevents damage to bark while keeping the net taut. For larger trees, consider zippered sections in the net to allow easy access for pruning or harvesting without removing the entire cover.
☀️ Step 3: Drape and Secure the Net Properly
Gently drape the net over the frame or tree, ensuring it covers all branches and fruit clusters completely. Start from the top center and work downward to avoid trapping air pockets, which can create hot spots and stress the tree. Use clips, ties, or weights (like sandbags) to secure the edges firmly to the ground or frame.
Pay special attention to the base of the tree—pests like rodents or rabbits can dig underneath. Bury the net’s edges 2-3 inches deep or weigh them down with bricks or rocks to create a barrier. If your tree has low-hanging branches, tuck them into the net and secure with soft ties to prevent snagging.
✂️ Step 4: Monitor and Adjust for Seasonal Changes
Check the net weekly for tears, loose sections, or pest activity. I’ve found that early morning inspections work best—dew makes damage easier to spot. Repair any holes with patch kits or duct tape (for temporary fixes) and reinforce weak spots with additional clips. If your tree grows taller or wider, trim excess net and adjust the frame as needed.
Before harvest season, give the net a final inspection. Remove it only when fruit is fully ripe to avoid last-minute pest damage. Store the net in a dry, shaded area between seasons to prevent mildew or UV degradation. A well-maintained net lasts 5-7 years, saving you money and hassle in the long run.
⏰ Step 5: Time Your Installation for Maximum Effect
Install the net before buds swell in early spring—this traps overwintering pests like codling moths before they lay eggs. For stone fruits (peaches, cherries), add a second layer of fine mesh if local pests are particularly aggressive. Remove the net 2-3 weeks before harvest to allow fruit to ripen fully in sunlight, but leave it on if birds are a persistent problem.
Here’s the thing—timing is everything. If you wait until fruit appears, pests may already have infested your tree. I’ve seen entire crops lost because the net went up too late. Proactive installation is the key to year-round protection without chemical interventions.
Tips & tricks for perfect fruit tree net installation
These practical tips will help you avoid common pitfalls and maximize effectiveness when setting up your fruit tree protection system.
Mesh Selection Matters: While a fine-mesh net with openings smaller than ½ inch works for most pests, consider adding a second layer of ¼-inch mesh for stone fruits like peaches or cherries if your area has particularly aggressive pests. The extra layer blocks smaller insects without sacrificing airflow. I've found that this double-layer approach completely eliminates codling moth damage in my orchard. For citrus trees, you might need even finer mesh to block fruit flies.
Frame Positioning: That 6-12 inch gap between the frame and tree canopy isn't just about aesthetics—it's about creating an effective pest barrier. Position the frame so it extends at least 12 inches beyond the tree's outermost branches to prevent pests from crawling underneath. I've seen wasps and hornets exploit even small gaps, so take the extra time to get this right. For trees with irregular shapes, consider using adjustable frames or additional stakes to maintain proper spacing.
Base Protection: The base of your tree is the most vulnerable spot—rodents and rabbits can easily dig underneath if not properly secured. Beyond burying the edges 2-3 inches deep, I recommend creating a 12-inch wide barrier around the tree's base using heavy landscape fabric or metal flashing buried 6 inches deep. This creates an underground barrier that pests simply can't penetrate. For trees in windy areas, anchor the base with concrete-filled stakes every 3 feet to prevent the net from blowing up.
Seasonal Timing: That early spring installation window is critical, but don't forget about fall protection. Install nets again in late summer if you're in a region with persistent fall pests like armyworms or late-season fruit flies. I've seen trees completely stripped of leaves and fruit when homeowners only installed nets in spring. For tropical climates, consider year-round protection since pests don't follow seasonal patterns. The key is to install before you see any signs of pest activity—not after.
Pro Tips for Fruit Tree Net Catcher
- These practical tips will help you avoid common pitfalls and maximize effectiveness when setting up your fruit tree protection system.
- The extra layer blocks smaller insects without sacrificing airflow.
- Frame Positioning: That 6-12 inch gap between the frame and tree canopy isn't just about aesthetics—it's about creating an effective pest barrier.
Frequently asked questions
about fruit tree net catchers—because every gardener deserves peace of mind (and fewer fallen apples!).When is the best time to install a fruit tree net catcher?
Install your net catcher before fruit sets in early spring (typically March–April, depending on your climate). This ensures pests like birds, squirrels, or insects can’t access the tree as buds form. For late-blooming trees (e.g., peaches), check local frost dates—nets should be up at least 2 weeks before harvest to protect ripening fruit.
Will fruit tree nets keep out all pests, or just birds?
Most nets (with 1/2-inch to 1-inch mesh) block birds, squirrels, and small mammals, but larger critters (like raccoons or deer) may still find ways in. For extra defense, pair nets with repellent sprays or physical barriers (e.g., wire cages) around the tree base. Always secure nets tightly—gaps are an open invitation to pests!
How long do I need to leave the net on the tree?
Keep nets on throughout the growing season—from bloom until harvest—and remove them only after all fruit is picked. Early removal risks reinfestations. For trees like figs or persimmons (which ripen unevenly), extend coverage until the last fruit drops. Pro tip: Mark your calendar with harvest dates to avoid forgetting!
What’s a good alternative if I don’t want to use a net?
Try these net-free options:
- Scare tactics: Hang old CDs, reflective tape, or predator decoys (like owls) to deter birds.
- Harvest timing: Pick fruit early (before pests target it) or use it for jams/juices.
- Physical barriers: Wrap trunks with tree guards or install fencing around young trees.
- Pest-specific traps: Use bird netting only on branches (not the whole tree) or set squirrel baffles.
My net is tearing or sagging—how do I fix it?
Common fixes:
- Tighten supports: Adjust hoops or stakes so the net sits 1–2 feet above the ground and snug against branches.
- Patch holes: Use zip ties or duct tape (for temporary fixes) or sew in a patch with heavy-duty thread.
- Upgrade materials: Choose UV-resistant or heavier-duty mesh (e.g., 1.5mm thickness) for longevity.
Wrapping up and next steps
Protecting your fruit trees from pests and wildlife doesn’t have to be a guessing game—fruit tree net catchers offer a simple, effective solution for safeguarding your harvest year-round! 🌳🍎 Whether you’re a seasoned gardener or just starting out, these nets provide peace of mind while keeping your trees thriving.
Now that you’re equipped with the right materials and answers to common questions, it’s time to take action.
Your next step? Measure your trees, gather your supplies, and install your net catchers before pests strike. Happy harvesting awaits! 🌟