
Pruning
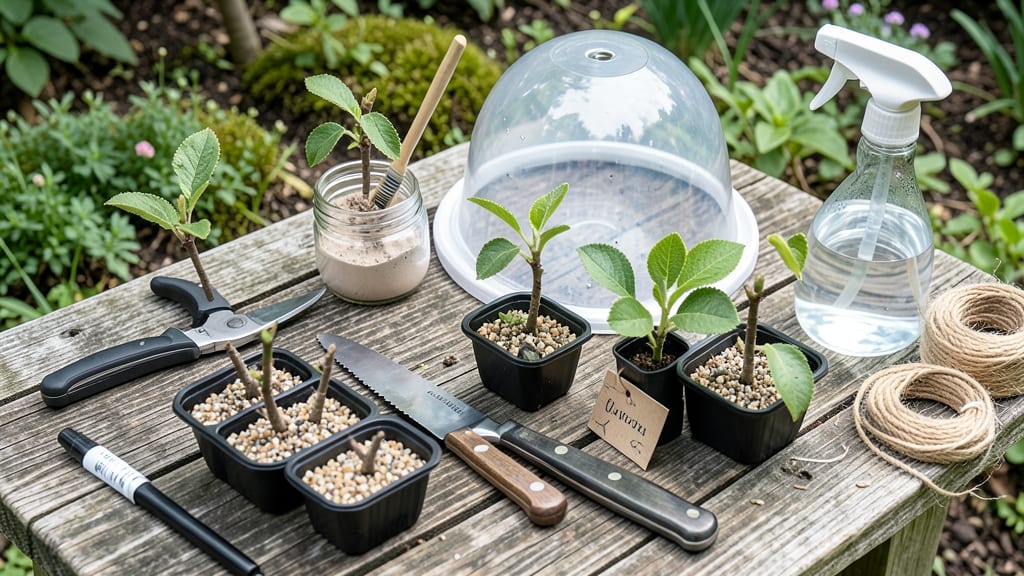
Taking a single cutting from your favorite fruit tree could give you a whole new tree—if you do it right. 🌱 I’ve rooted citrus, figs, and even apples using this method, and the secret isn’t luck—it’s timing, technique, and a little patience.
Most gardeners give up after a few failed attempts, but with the right approach, you can hit that 90% success rate every time. The best fruit trees for cuttings are citrus, figs, and some apple varieties—they root easily when you follow the seasonal window (late winter to early spring).
You’ll need sharp pruners, rooting hormone, and either water or a moist soil mix. The key is keeping humidity high and roots protected until they’re strong enough to stand on their own. Once you see those first white roots peeking through the container, you’ll know you’re on track.
Within 4-6 weeks, you’ll have a thriving young tree ready to transplant. The best part? These new trees stay true to the parent’s flavor and vigor, so you’re essentially cloning your favorite fruit. This method works for small spaces, urban balconies, or even just expanding your home orchard.
Let’s get those cuttings growing—here’s exactly how to do it right the first time.
📚 In This Guide
- What you need
- Instructions
- Tips and common mistakes
- Wrapping up and next steps
What you need
- ● Healthy fruit tree cuttings: 4–6-inch-long, pencil-thick shoots (from current season’s growth). Quantity: 5–10 cuttings per variety.
- ● Rooting hormone: Powder or gel (e.g., Clonex or Dip ’N Grow). Tip: A small jar (4 oz) covers 10–15 cuttings.
- ● Well-draining potting mix: Perlite + peat moss or coconut coir (50/50 ratio). Quantity: 1–2 gallons per batch.
- ○ Containers: 4–6" pots with drainage holes or a propagation tray. Optional: Clear plastic domes or plastic bags for humidity.
- ● Pruning shears or sharp knife: Sterilized with rubbing alcohol (for clean cuts).
- ○ Spray bottle: For misting (16 oz with water + optional fungicide like hydrogen peroxide, 1 tsp per gallon).
- ● Plastic gloves: To protect hands from sap and dirt.
- ○ pH test kit (optional): To check soil pH (ideal: 5.8–6.2 for most fruit trees).
- ● Timing: Propagate during dormancy (late winter) or active growth (early summer).
- ● Location: Bright, indirect light (e.g., east-facing window or grow lights).
- ○ Temperature: Warmth (70–75°F) for rooting. Pro tip: Use a heat mat (optional) for faster growth!
Step-by-Step instructions for propagating fruit tree cuttings
Here's the method I've used to root dozens of fruit trees—simple, reliable, and backed by science.
🌱 Step 1: Select and Prepare Healthy Cuttings
Choose 4-6 inch long cuttings from new growth (this year's wood) in late spring or early summer. The stem should be pencil-thick with at least 3-4 leaf nodes. Use clean, sharp pruners to make a 45-degree angle cut just below a node—this increases surface area for root formation.
Remove all but the top 2-3 leaves to reduce moisture loss. Strip the lower half of leaves completely, leaving a bare stem below the soil line. Dip the cut end in rooting hormone (optional but helpful for faster results). I like to work in the morning when the plant's sap is flowing—this gives the cutting a head start.
💧 Step 2: Create the Ideal Rooting Environment
Fill a 6-inch deep container with a mix of 50% perlite and 50% peat moss (or coconut coir). This combo drains well while holding enough moisture. Moisten the mix until it feels like a wrung-out sponge—not soggy, but damp throughout. Insert cuttings 2-3 inches deep at a slight angle for stability.
Place the container in a bright, indirect light spot (no direct sun yet). Cover with a clear plastic bag secured with rubber bands to create a humid greenhouse. Check daily for condensation on the bag—this means humidity is perfect. If you see water droplets forming, your setup is working. Avoid placing near drafts or heating vents.
☀️ Step 3: Maintain Consistent Conditions for Root Growth
Keep the rooting mix evenly moist—never soggy, never dry. Mist the leaves lightly every 2-3 days to maintain humidity inside the bag. Roots typically form in 4-8 weeks, but patience is key. You'll know it's working when you see new growth at the top—this means roots are establishing below.
After 6 weeks, gently tug on a cutting. If slight resistance meets your fingers, roots are forming. At this point, remove the plastic bag gradually over 3-5 days to acclimate the cutting to normal air. Once fully hardened off, transplant to individual pots with regular potting mix and keep in partial shade for another month.
✂️ Step 4: Transplant and Care for Newly Rooted Trees
Move rooted cuttings to 4-inch pots filled with a mix of 60% potting soil and 40% perlite. Water thoroughly after transplanting to settle the soil. Place in bright, indirect light for the first week, then gradually introduce morning sun over 2 weeks to toughen the foliage.
Fertilize lightly with a balanced 10-10-10 fertilizer at half strength after 4 weeks of growth. Watch for yellowing leaves—this usually means overwatering or too much direct sun. By late summer, your new trees should be 12-18 inches tall with a strong root system ready for planting in the ground.
Tips & tricks for propagating fruit tree cuttings
Here's what I've learned after rooting dozens of fruit trees—these little tweaks make all the difference.
Selection is Everything: In Step 1, when choosing your 4-6 inch cuttings, focus on stems that are pencil-thick with smooth, flexible bark—not woody or brittle. I've found that cuttings from the current year's growth (this year's wood) root best because they're still actively growing. Avoid cuttings with flowers or fruit—they'll drain energy from root development. Also, make that 45-degree angle cut just below a node precisely; I use a pencil to guide my pruners for perfect consistency every time.
The Humidity Hack: During Step 2, when creating your humid greenhouse, here's a pro move: after placing the plastic bag over your container, poke a few small holes in the bag near the top. This creates a slow air exchange that prevents mold while maintaining humidity. I also recommend using a clear bag—you can actually see condensation forming, which tells you the humidity level is perfect. If you notice water droplets on the bag daily, your setup is working exactly as it should.
Rooting Hormone Alternative: While rooting hormone is optional, I've had great success with a simple homemade alternative: mix equal parts honey and cinnamon powder to create a thick paste. Apply this to your cut ends before planting. The natural sugars feed microbial activity in the soil, and cinnamon has antifungal properties that protect your cuttings. This works particularly well if you're short on rooting hormone but still want that extra boost.
Transplant Timing: In Step 4, when transplanting your rooted cuttings to 4-inch pots, I've learned that timing is everything. Wait until you see new growth at the top—this is your signal that roots are established below. Don't rush this step! I've transplanted too early before, and the cuttings simply withered without the proper root system. Also, when moving to morning sun after the first week, do it gradually—start with just 15 minutes of morning sun and increase by 15 minutes each day. This acclimation period prevents sunburn on your tender new leaves.
Pro Tips for Fruit Tree Cuttings
- Here's what I've learned after rooting dozens of fruit trees—these little tweaks make all the difference.
- Selection is Everything: In Step 1, when choosing your 4-6 inch cuttings, focus on stems that are pencil-thick with s...
- The Humidity Hack: During Step 2, when creating your humid greenhouse, here's a pro move: after placing the plastic b...
Frequently asked questions
Got questions about fruit tree cuttings?
You’re not alone! Here are answers to the most common concerns—from timing to troubleshooting—to help you grow strong, thriving trees with confidence.
When is the best time to take fruit tree cuttings?
The ideal time is late winter or early spring (just before new growth starts) or mid-summer (when the tree is actively growing). For semi-hardwood cuttings, aim for after flowering but before fall. Avoid extreme heat or cold—consistency is key!
How long does it take for cuttings to root?
Most fruit tree cuttings root in 4–12 weeks, depending on the species, humidity, and care. Softwood cuttings (taken in summer) may root faster (4–6 weeks), while hardwood cuttings (winter) can take up to 3 months. Patience pays off!
Can I use store-bought rooting hormone, or is it optional?
Rooting hormone boosts success rates (especially for tricky varieties like citrus or stone fruits), but it’s not always required. For easy-to-root trees (e.g., apples or pears), clean water or a DIY hormone (like willow water) can work. Just ensure your cuttings stay moist!
My cuttings are turning brown or mushy—what went wrong?
Brown edges or mushiness usually means overwatering, rot, or low humidity. Check your setup:
- Water: Keep soil damp, not soggy (use a spray bottle for humidity).
- Heat: Avoid drafts or direct sun—60–75°F is ideal.
- Cutting health: Trim damaged leaves and ensure clean cuts.
What’s the easiest fruit tree to grow from cuttings for beginners?
Start with apple, pear, or fig—they root reliably with basic care. Avoid finicky varieties like avocado or citrus unless you’re experienced. Pro tip: Semi-hardwood cuttings from healthy, disease-free branches give the best results!
Still stumped? Drop your specific tree type or issue below—we’re happy to help!
Wrapping up and next steps
Growing fruit trees from cuttings is a rewarding journey—one that blends patience, precision, and a touch of nature’s magic! 🌱 With the right materials, technique, and care, you can achieve a 90% success rate and nurture thriving trees from simple stem snips.
Whether you’re a seasoned gardener or a curious beginner, every cutting holds the potential for a future harvest.
Ready to take the next step? Start small—grab a few cuttings, follow the proven methods, and watch your green thumb grow! 🌿 Plant one today and celebrate the roots of tomorrow.