
Pruning
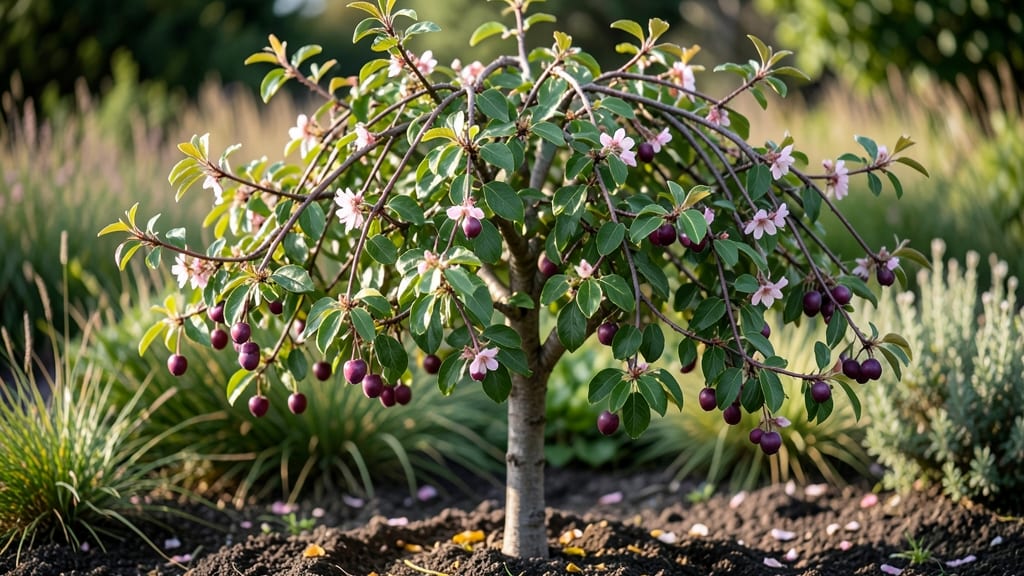
Pruning your cherry plum tree isn’t just about shaping branches—it’s the secret to heavy fruit loads and fewer pests. 🌿 I’ve seen trees with half the blooms produce twice the fruit after just one proper pruning session, and the difference in airflow keeps those plums from rotting before harvest.
The key is timing and technique: prune in late winter or early spring before buds swell, and always cut back to an outward-facing bud. Thinning out crowded branches lets sunlight reach the center of the tree, where fruit often struggles to ripen.
You’ll notice fewer broken limbs too—those heavy plums don’t stand a chance on weak wood. By summer, you’ll be picking clusters of deep purple fruit that practically fall into your hands. The flavor? Sweet-tart perfection that’s impossible to resist. And the best part?
Healthy trees produce better next year, so this one pruning session keeps paying dividends for seasons to come. Works for both young trees and mature specimens, though older wood needs gentler treatment. Here’s how to do it right without stressing the tree.
📚 In This Guide
- What you need
- Instructions
- Tips and common mistakes
- Wrapping up and next steps
What you need
- ● Pruning shears: Bypass pruners with sharp, clean blades (for cuts up to ½ inch thick). Example: Felco F-2 or Corona Tools.
- ● Loppers: For thicker branches (½ to 1½ inches). Example: Fiskars PowerGear.
- ● Pruning saw: For branches over 1½ inches in diameter. Example: Fiskars Steel Pruning Saw.
- ● Disinfectant: 70% isopropyl alcohol or a 10% bleach solution (to sterilize tools between cuts).
- ● Gloves: Heavy-duty gardening gloves (to protect from thorns and sap).
- ● Ladder or step stool: Sturdy and tall enough to reach the tree’s canopy safely.
- ○ Twine or zip ties: For securing branches during pruning (optional but helpful).
- ● Marking twine or spray paint: To tag branches for removal or special attention.
- ● Heavy-duty trash bags: For collecting pruned branches and debris.
- ● Hand pruners with a ratchet mechanism for extended pruning sessions.
- ● A pruning sealant (like Tree Seal Tape) to protect large cuts from disease.
- ● Safety glasses and long sleeves to protect against sap and debris.
- ● A notebook or app (like iTree or PruneTime) to track pruning notes and progress.
Step-by-Step guide to pruning your cherry plum tree for bountiful fruit
Here’s how I transform a cherry plum tree from a tangled mess into a high-yielding fruit machine—just follow these clear steps.
✂️ Step 1: Time Your Pruning for Best Results
Prune your cherry plum tree during late winter or early spring, just as buds begin to swell but before new growth starts. This timing ensures you’re not cutting into next year’s fruit buds while still removing dead or crossing branches. If you missed the window, late summer after harvest works too, but avoid heavy pruning in fall—it stresses the tree and invites disease.
I always check the buds first: if they’re still tight and dormant, I wait. Once they plump up slightly, that’s my signal to grab the shears. Cold snaps can delay bud swell, so don’t rush—wait until consistent daytime temperatures stay above 40°F for at least a week.
✂️ Step 2: Remove Dead, Diseased, and Crossing Branches
Start by scanning the tree for dead wood—branches that snap easily or have no bark. Cut these out first, making clean cuts just outside the branch collar (the swollen area where the branch meets the trunk). Next, look for crossing branches that rub against each other, creating wounds where disease can enter. Remove the smaller of the two branches at its base.
I use sterilized pruning shears for every cut—dipping them in rubbing alcohol between branches prevents spreading any hidden infections. If a branch is thicker than ¼ inch, switch to a pruning saw for a smooth cut. Never leave stubs; always cut back to the branch collar to encourage proper healing.
☀️ Step 3: Thin Out Overcrowded Branches for Better Airflow
Cherry plum trees produce fruit on spurs (short, stubby branches), so focus on opening up the center of the tree to let sunlight and air circulate. Remove branches growing inward at an acute angle—these block light and create humid pockets where fungus thrives. Aim to keep the tree open and vase-shaped, with branches spaced 8-12 inches apart.
Watch for water sprouts (fast-growing, vertical shoots) and suckers (shoots from the base)—these steal energy from fruit production. Cut them out completely at the base. If you’re unsure whether a branch is dead or alive, scratch the bark with your fingernail: green underneath means it’s still alive; brown means it’s dead and should go.
✂️ Step 4: Encourage Fruit Production with Strategic Cuts
To maximize fruit load, prune to balance growth and fruiting. On young trees, remove 1-2 of the oldest branches each year to stimulate new, productive wood. On mature trees, cut back last year’s fruit-bearing branches by ⅓ to ½ their length—this redirects energy to new spurs where next year’s fruit will form.
I always step back after pruning to check the tree’s shape. The goal is 60-70% sunlight penetration through the canopy. If you see dense clusters of branches, thin them further. Avoid heavy pruning in one season—spread it over 2-3 years to avoid shocking the tree. A good rule: never remove more than 25% of the tree’s canopy in a single year.
💧 Step 5: Clean Up and Protect Your Tree
After pruning, rake up all debris and dispose of it in the trash—don’t compost it, as diseased branches can spread pathogens. Apply a fungicide spray (like copper-based or neem oil) to any fresh cuts to prevent bacterial or fungal infections. This is especially important if your area has a history of silver leaf disease or brown rot, common in cherry plums.
Water the tree deeply after pruning to help it recover. Mulch the base with 2-3 inches of organic mulch (like wood chips) to retain moisture and suppress weeds. Avoid piling mulch against the trunk—keep it 2-3 inches away to prevent rot. Finally, monitor the tree for new growth in 3-4 weeks; healthy shoots mean your pruning paid off!
Tips & tricks for pruning your cherry plum tree
Here's what nobody tells you about pruning that'll actually transform your cherry plum's fruit production.
Bud Swell is Your Signal: The key to perfect timing in Step 1 isn't just watching the calendar—it's checking those buds. When they start to plump up slightly (like a tiny green balloon), that's your cue. If you're unsure, do the fingernail test: gently scratch the bark. If it's green underneath, wait a few more days. I've missed the window twice by rushing, and those were years I barely got any fruit. The 40°F threshold is important too—cold snaps can trick you into thinking buds are ready when they're not.
Branch Collar Matters More Than You Think: In Step 2, when you're making those clean cuts just outside the branch collar, don't just eyeball it. The collar is that swollen area where the branch meets the trunk, and it's crucial for proper healing. If you cut too close or leave a stub, you're inviting disease right at the wound site. I've seen pruning wounds take months to heal when people skip this detail. For branches thicker than ¼ inch, use a pruning saw—shears will crush the wood, creating jagged edges that heal poorly.
Sunlight Mapping Technique: After pruning in Step 3, stand back and visualize sunlight paths through your tree. Hold a flashlight at different angles to see where light gets blocked. You're aiming for that 60-70% sunlight penetration mentioned in Step 4. I've mapped trees with a grid system—imagine your tree as a clock face and aim for branches spaced every 3-4 hours (about 8-12 inches apart). This creates even light distribution that maximizes fruit set. Don't forget to check the lower branches too—they often get overlooked but need light to produce fruit.
Yearly Pruning Schedule: The 2-3 year pruning plan in Step 4 is actually a 4-year cycle if you're strategic. Year 1: Focus on removing dead wood and crossing branches. Year 2: Thin out crowded areas and encourage an open shape. Year 3: Prune to stimulate new growth and fruit spurs. Year 4: Light maintenance to maintain the shape. This rotation prevents shocking the tree while gradually improving its structure. I've seen trees go from sparse fruit to abundant harvests in just 3 years by following this approach.
Pro Tips for Cherry Plum Tree Fruit
- Here's what nobody tells you about pruning that'll actually transform your cherry plum's fruit production.
- Bud Swell is Your Signal: The key to perfect timing in Step 1 isn't just watching the calendar—it's checking those buds.
- Branch Collar Matters More Than You Think: In Step 2, when you're making those clean cuts just outside the branch collar, don't just eyeball it.
Frequently asked questions
Got questions about pruning your cherry plum tree for the best fruit harvest? You’re in the right place! Here are some of the most common queries—plus straightforward answers to keep your tree thriving.
When is the best time to prune a cherry plum tree for fruit production?
Prune your cherry plum tree during late winter or early spring (before buds swell but after the worst cold snaps). This timing ensures minimal stress on the tree while promoting vigorous growth and fruit development. Avoid pruning in fall—it can encourage new growth that won’t harden off before winter, making it vulnerable to frost damage.
How much should I prune to maximize fruit load?
Aim to remove 20-30% of the tree’s total growth each year. Focus on:
- Dead, diseased, or crossing branches (to improve airflow)
- Suckers or water sprouts (to redirect energy to fruit-bearing wood)
- Overcrowded branches (to reduce competition for sunlight)
What should I do if my cherry plum tree isn’t fruiting after pruning?
If your tree skips fruiting, check these common culprits:
- Improper timing: Pruning too late in spring can delay flowering.
- Lack of sunlight: Thin dense branches to ensure light reaches the center.
- Nutrient deficiency: Test soil for nitrogen, phosphorus, or potassium imbalances.
- Pollination issues: Cherry plums often need cross-pollination—plant a compatible variety nearby.
Can I prune cherry plum trees in summer, and if so, how?
Light summer pruning is safe in moderation—focus on:
- Removing sucker growth (aggressive shoots at the base)
- Thinning out excessive leafy growth to improve airflow
Are there any alternatives to traditional pruning for cherry plum trees?
While traditional pruning is the gold standard, you can supplement with:
- Thinning fruit clusters (hand-pick small or crowded plums in early summer)
- Root pruning (for young trees—trim roots in early spring to encourage above-ground growth)
- Selective fertilizing (use bloom-boosting fertilizers like 10-10-10 in early spring)
Wrapping up and next steps
Growing a thriving cherry plum tree with a bountiful harvest starts with the right pruning techniques! By mastering selective pruning and prioritizing airflow and sunlight, you’ll encourage healthier branches, better fruit development, and fewer pests.
Remember, consistency is key—regular maintenance ensures your tree stays productive and vibrant for years to come.
Ready to transform your cherry plum tree into a fruit-bearing powerhouse? Grab your pruners and get started today! 🌿✨ For even more tips, check out our pruning guide or join a local gardening community to share your progress.