
Trees
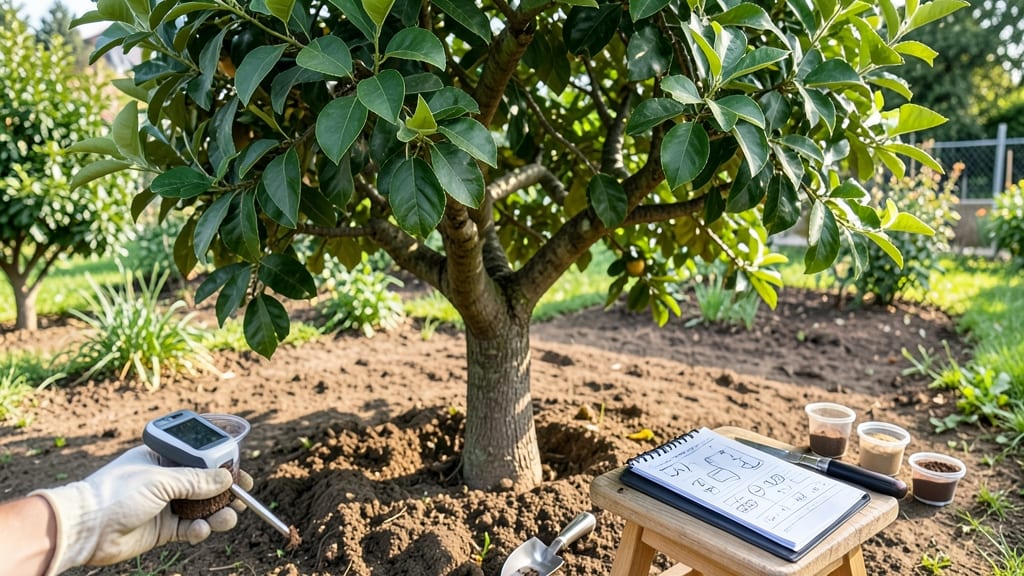
Testing your soil before planting fruit trees could mean the difference between a bountiful harvest and years of struggling with stunted growth. 🌳 I learned this the hard way when my apple trees produced tiny, sour fruit—until I finally tested the soil and adjusted the pH. The right balance of nutrients and pH isn’t just important; it’s the foundation of healthy fruit trees that thrive and produce year after year.
Most gardeners skip soil testing because they assume their soil is fine, but fruit trees are picky eaters. Apples, peaches, and citrus all need slightly different conditions—some prefer slightly acidic soil while others thrive in neutral or alkaline.
A simple DIY test or lab analysis reveals exactly what your soil lacks, whether it’s nitrogen, potassium, or the right pH balance. Without this step, you’re essentially guessing, and that’s how you end up with weak trees or poor fruit quality.
Once you know your soil’s secrets, amending it becomes straightforward. Too acidic? A sprinkle of lime raises the pH. Too alkaline? Sulfur or peat moss can help.
The goal is to match your soil to the specific needs of your fruit trees—because when the soil is right, the trees reward you with strong roots, vibrant foliage, and fruit that tastes like it came from a professional orchard.
Let’s get those test kits ready and turn your soil into the perfect growing medium.
This method works for backyard orchards, container-grown fruit trees, and even large-scale plantings. Whether you’re starting fresh or troubleshooting an underperforming tree, soil testing is the first step toward the harvest of your dreams. The best part? You’ll know exactly what your trees need before you even plant them.
📚 In This Guide
- What you need
- Instructions
- Tips and common mistakes
- Wrapping up and next steps
What you need
- ● Soil testing kit: A home lab kit (e.g., Luster Leaf Rapitest or MySoil) or a professional-grade kit (for deeper analysis). Quantity: 1.
- ● Sampling tools: Trowel or garden spade (stainless steel preferred).
- ● Clean, sterilized 50mL plastic containers (5–10 per test site).
- ● Disposable gloves (nitrile or latex-free).
- ● Measuring tools: Ruler or measuring tape (for depth consistency).
- ● Pencil and labeled data sheet (or digital notes app).
- ○ pH testing strips or digital pH meter: Optional but helpful for quick checks before full testing. Quantity: 1–2.
- ● Soil sieve: For removing debris from samples (improves accuracy).
- ● Moisture meter: To check soil hydration before testing (dry soil skews results!).
- ● GPS or mapping tool: To log test site locations (especially useful for large orchards).
- ● Lime or sulfur: Prep for amendments if your test reveals unbalanced pH (e.g., blank">pelletized lime for acidity or blank">elemental sulfur for alkalinity). Quantity: Varies by orchard size.
- ● Reference guide: A book or app (e.g., University Extension Service reports) for interpreting results.
Step-by-Step guide to testing soil for fruit trees
Accurate soil testing is the foundation for healthy fruit trees—skip this step and you risk poor yields or stunted growth.
🌱 Step 1: Collect Soil Samples Properly
Grab a clean trowel or shovel and dig 6-8 inches deep at 4-6 spots around your orchard area, spacing them 10-15 feet apart. Mix these samples together in a clean bucket—this gives you an average reading for the entire planting zone. Avoid testing soil near tree trunks or where fertilizer has been recently applied, as those spots skew results.
Use a sterilized container (like a new plastic bucket) to hold your sample. Remove any rocks, debris, or plant material—just pure soil. The goal is to test the root zone where your fruit trees will grow, not surface layers that might be different. If you're testing multiple orchards or sections, collect samples separately to compare results later.
💧 Step 2: Prepare the Sample for Testing
Let your collected soil air-dry for 24-48 hours until it crumbles easily between your fingers. This removes excess moisture that could interfere with test accuracy. Once dry, break it into small clumps (about the size of a walnut) and discard any remaining debris. You only need 1-2 cups of this prepared soil for most at-home test kits.
If you're sending samples to a lab, follow their specific instructions—some require dry soil only, while others accept moist samples. I always double-check the lab’s guidelines to avoid delays or incorrect results. For at-home tests, use the included scoop or follow the kit’s measurement instructions precisely. Too much or too little soil can throw off your pH and nutrient readings.
☀️ Step 3: Perform the Test (At-Home or Lab)
For at-home test kits, follow the package instructions carefully. Most involve mixing soil with water or a chemical solution, then comparing color changes to a chart. I like digital meters because they give instant pH readings—no guessing required. Take multiple readings from different spots in your sample to confirm consistency. If results vary widely, you may need to test more locations.
For lab testing, package your sample in a ziplock bag (label it clearly!) and include any additional forms or payment. Labs test for pH, nitrogen, phosphorus, potassium, and micronutrients—far more detailed than at-home kits. Results typically arrive in 1-2 weeks, so plan ahead if you’re preparing for spring planting. I always request a full analysis, even if I only suspect one issue like low pH.
✂️ Step 4: Interpret Results and Adjust
Most fruit trees thrive in slightly acidic to neutral soil (pH 6.0–7.0). If your test shows pH below 6.0, amend with lime (follow package rates). For pH above 7.0, use sulfur or peat moss to lower it gradually. Never make drastic changes—adjust 0.5 pH units per year to avoid shocking roots. I test again in 3-6 months to monitor progress.
Nutrient deficiencies? Add organic compost for slow-release fertility or balanced fertilizer (like 10-10-10) based on lab recommendations. For example, if phosphorus is low, work in bone meal before planting. Always water thoroughly after amending to help nutrients integrate into the soil. Keep records of your adjustments—what worked last year might need tweaking this season.
📝 Step 5: Plan Amendments Before Planting
Spread compost or organic matter over the test area to a depth of 2-3 inches, then till it into the top 6 inches of soil. This improves drainage, adds nutrients, and helps stabilize pH over time. For heavy clay soils, mix in sand or perlite to loosen the texture. I like to do this 2-3 months before planting to let amendments settle and microbes break them down.
If you’re planting bare-root trees, soak their roots in a bucket of water mixed with mycorrhizal fungi (available at nurseries) for 15-30 minutes before setting them in amended soil. This boosts root establishment and disease resistance. Label your amended beds with the test date and amendments used—future you (or your garden helper) will thank you when troubleshooting later.
Tips & tricks for perfect soil testing results
Here's what nobody tells you about getting accurate soil test results the first time.
Sampling Precision: In Step 1, when collecting your 4-6 spot samples, focus on areas where you plan to plant—not just random spots. I learned this the hard way after testing near a compost pile and getting skewed results. Use a zig-zag pattern across your orchard area for the most representative sample. For large properties, divide into zones (e.g., north/south sections) and test separately to identify variations.
Drying Technique: The 24-48 hour air-drying period in Step 2 is non-negotiable for accurate results. I recommend spreading soil on a clean tarp or baking sheet in a dry, shaded area. Avoid direct sunlight which can bake the soil unevenly. Test for dryness by squeezing—it should crumble like dry sand, not stick together. This step removes moisture that can interfere with pH readings and nutrient analysis.
Kit Consistency: When using at-home test kits in Step 3, measure your 1-2 cups of prepared soil precisely. Too much soil dilutes the chemical reaction, while too little can give inconsistent results. I always use the included scoop or a clean, dry measuring cup. For digital meters, calibrate first with distilled water as instructed—this ensures your pH readings are accurate from the start.
Amendment Timing: In Step 5, when planning amendments, remember that organic matter takes time to break down. I start my 2-3 month pre-planting preparation in late winter for spring planting. This gives microbes enough time to colonize and improve soil structure. For quick fixes, you can use fast-acting amendments like coffee grounds (for acid-loving trees) but always follow up with compost for long-term benefits.
Pro Tips for Soil Testing For Fruit Trees
- Here's what nobody tells you about getting accurate soil test results the first time.
- Sampling Precision: In Step 1, when collecting your 4-6 spot samples, focus on areas where you plan to plant—not just random spots.
- Drying Technique: The 24-48 hour air-drying period in Step 2 is non-negotiable for accurate results.
Frequently asked questions
Got questions about soil testing for your fruit trees? You’re not alone! Here are some of the most common concerns—plus straightforward answers to help you grow a healthier orchard.
How often should I test my fruit tree soil?
For established trees, test soil every 2–3 years to monitor pH and nutrient levels. If you notice poor growth, yellowing leaves, or pests, test immediately. New plantings should be tested before planting and again after 6 months to adjust for any deficiencies.
What’s the best time of year to test soil?
Test in early spring (March–April) or fall (September–October) when soil is workable but not frozen. Avoid testing after heavy rain or right after fertilizing, as results may be skewed. Pro tip: Aim for a time when you can act on the results before planting season!
Can I DIY soil testing, or should I use a lab?
DIY test kits (like pH strips or colorimetric tests) are quick and cheap but less accurate for full nutrient analysis. For precise results, send samples to a local agricultural extension lab (often under $20). Labs test for pH, nitrogen, phosphorus, potassium, and micronutrients—critical for fruit trees!
My soil test says the pH is off—how do I fix it fast?
To raise pH (alkaline soil), add elemental sulfur or aluminum sulfate. For lowering pH (acidic soil), use pelletized lime or wood ash. Important: Adjust pH gradually (0.5 units per year) and retest soil 3–6 months later. Overcorrecting can harm roots!
What if my fruit tree looks healthy but the soil test shows problems?
Healthy-looking trees can still have hidden issues! If tests reveal deficiencies (e.g., low magnesium or zinc), foliar sprays or slow-release fertilizers can help. For example, Epsom salt (magnesium sulfate) can be sprinkled around the base in spring. Monitor growth over 1–2 seasons to see improvements.
Wrapping up and next steps
Soil testing for fruit trees isn’t just science—it’s the secret ingredient to unlocking bountiful harvests! 🌱 By understanding your soil’s pH, nutrients, and structure, you’re giving your orchard the perfect foundation for growth.
Whether you’re a backyard gardener or a commercial grower, taking this step shows you’re serious about nurturing healthy, productive trees.
Ready to take action? Grab a soil sample, send it to a lab, and let the results guide your next move—whether it’s adjusting pH, amending soil, or choosing the right amendments. Your future fruit trees will thank you! 🍎✨