
Fertilization
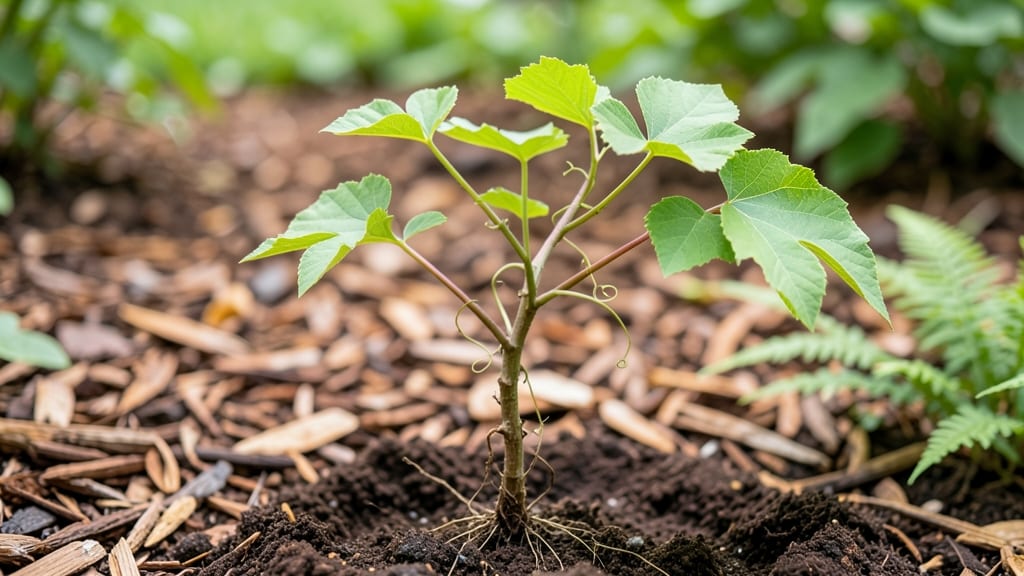
Growing kiwi fruit seedlings from seed reveals nature’s patience—4 weeks of coaxing turns a speck of brown into a sturdy vine ready for the garden. 🌱 I’ve started dozens, and the secret isn’t fancy equipment but mimicking kiwi’s wild tropical roots: warmth, moisture, and just enough light to spark growth without scorching.
The soil mix matters more than you’d think—too dense and seeds suffocate; too loose and they dry out. Use a blend of 50% potting soil and 50% perlite, then keep it damp like a wrung-out sponge.
A clear plastic dome or ziplock bag creates a greenhouse effect, but crack it open daily to prevent mold. Most seeds sprout in 10-20 days, though some stubborn ones take the full month.
By week 4, your seedlings should have 2-3 true leaves and be sturdy enough to handle their first pinch of fertilizer. The real magic happens when you transplant them—kiwi vines hate root disturbance, so use 3-inch pots first and harden them off slowly.
Even in zones 7-9, where kiwis thrive, winter protection is key for young plants. Here’s the thing: kiwi seedlings grow slow at first, but once established, they’ll reward you with 10+ years of fruit. The first year is about building roots; the second, you’ll see the real show.
Now, let’s get those seeds sprouting!
📚 In This Guide
- What you need
- Instructions
- Tips and common mistakes
- Wrapping up and next steps
What you need
- ● Kiwi seeds: 3–5 fresh, plump seeds from an organic, ripe kiwi fruit (avoid store-bought seeds if treated with fungicides).
- ● Well-draining potting mix: 1–2 gallons of a sterile, seed-starting blend (look for labels like "peat-free" or "organic" for eco-friendliness). Pro tip: Mix in perlite or vermiculite (1 part to 3 parts soil) for aeration!
- ● Small seedling pots or trays: 2–4 biodegradable pots (2–3 inches deep) or a seed tray with drainage holes.
- ● Clear plastic dome or plastic wrap: To create a mini greenhouse effect and retain humidity.
- ● Spray bottle: For gentle watering (avoid over-saturating the soil!).
- ● Grow lights or sunny windowsill: A south-facing window (6+ hours of sunlight daily) or a LED grow light (12–16 hours/day for optimal growth).
- ○ Fertilizer (optional but helpful): A balanced liquid fertilizer (5-5-5 or 10-10-10 NPK ratio) diluted to half-strength for seedlings.
- ● Tweezers or toothpick: For carefully placing tiny seeds into the soil.
- ● Small hand trowel: For gently transplanting seedlings later.
- ○ Humidity tray (optional): A shallow tray filled with pebbles and water to boost moisture levels.
- ○ Thermometer (optional): To monitor soil temperature (ideal range: 65–75°F for germination).
- ● Label markers: To track seedling progress (kiwi seeds can take 4–6 weeks to sprout!).
Step-by-step guide to germinating kiwi fruit seedlings
Here’s how I’ve learned to coax kiwi seeds into strong, viable seedlings—without the common pitfalls.
🌱 Step 1: Extract and Stratify Seeds for Faster Germination
Kiwi seeds need a cold stratification period to break dormancy. Scoop out the seeds from a ripe kiwi, rinse off the pulp, and let them dry for 24 hours on a paper towel. Place them in a sealed plastic bag with a damp paper towel, then refrigerate for 4-6 weeks at 35-40°F. This mimics winter conditions and triggers germination.
Check the bag weekly—if the towel dries out, mist it lightly. The goal is moisture without sogginess. After 4 weeks, remove the seeds and let them sit at room temperature for 2-3 days to adjust before planting. This prep work prevents the 3-6 month germination delay that frustrates most growers.
💧 Step 2: Plant Seeds in a Warm, Moist Environment
Fill a 4-inch deep container with sterile seed-starting mix (never garden soil—kiwi seedlings hate compaction). Plant 2-3 seeds per cell at a depth of ½ inch, pressing lightly but not firmly. Cover the tray with a clear plastic dome or wrap to retain warmth and humidity. Place the container in a spot that stays at 70-75°F—a seedling heat mat helps if your home runs cooler.
Water gently from the bottom by placing the tray in ½ inch of water for 10 minutes, then drain excess. Overhead watering can dislodge seeds or bury them too deep. Expect germination in 4-8 weeks, but patience pays off—weak seedlings often fail because growers give up too soon.
☀️ Step 3: Provide Bright, Indirect Light for Seedling Strength
Once sprouts emerge, remove the plastic cover immediately to prevent damping-off. Move seedlings to a south-facing window or under a grow light for 14-16 hours daily. Kiwi seedlings need bright but indirect light—direct sun scorches delicate leaves. If leaves stretch toward the light (a sign of etiolation), raise the grow light to 4-6 inches above the plants.
Rotate the tray quarter-turn daily so seedlings grow straight. You’ll know light is sufficient when the first true leaves (not the initial seed leaves) appear deep green and sturdy. Weak, yellowing leaves mean more light is needed—kiwi seedlings are high-maintenance but worth the effort.
✂️ Step 4: Thin and Transplant for Robust Growth
When seedlings reach 2 inches tall (usually 6-8 weeks after germination), thin to the strongest seedling per cell. Snip the others at the base with clean scissors—don’t pull, or you’ll disturb roots. Transplant into 6-inch pots with fresh well-draining potting mix (kiwi roots hate soggy soil). Water deeply after transplanting to settle the soil around roots.
Keep newly transplanted seedlings in partial shade for 3-5 days to reduce stress. Gradually reintroduce them to bright light over a week. By 4 weeks, your seedlings should have 4-6 true leaves and be ready for outdoor hardening. This is where most growers fail—rushing transplanting leads to shock and stunted growth.
🪴 Step 5: Harden Off Before Outdoor Planting
Two weeks before your last frost, move seedlings outside to a sheltered, shaded spot for 1-2 hours daily. Increase exposure by 1 hour each day until they tolerate full sun for 6+ hours. Kiwi seedlings are tender—sudden cold or wind will damage them. Cover with a frost cloth if nighttime temps drop below 50°F during hardening.
By the time you plant outdoors, seedlings should be 4-6 inches tall with strong stems. Choose a sunny, wind-protected spot with well-draining soil—kiwi vines need space to climb, so plan for a trellis or fence. The first year focuses on root establishment; fruit won’t appear for 3-5 years, but strong starts now ensure a bountiful harvest later.
Tips & tricks for perfect kiwi fruit seedlings
Here's what nobody tells you about turning kiwi seeds into thriving plants—without the trial-and-error.
Stratification Success: The 4-6 week cold stratification period is non-negotiable for kiwi seeds. I learned this the hard way after trying to rush germination—seeds that skip this step often rot or never sprout. Use a refrigerator's crisper drawer for consistent 35-40°F temperatures, and avoid metal containers that can conduct cold too aggressively. The damp paper towel should feel like a wrung-out sponge: moist but not dripping. If condensation forms inside the bag, open it for 30 minutes to air out.
Lighting Strategy: Kiwi seedlings are light-sensitive divas. That 14-16 hour daily light requirement isn't just about duration—it's about quality. For window-grown seedlings, place a mirror at a 45-degree angle to reflect light onto the tray, effectively doubling your light coverage. If using grow lights, position them 4-6 inches above the plants and use full-spectrum bulbs that include red and blue wavelengths (kiwi seedlings respond best to these). The moment you see leaves stretching toward light (etiolation), it's time to adjust—either raise the lights or rotate the tray.
Transplanting Technique: When thinning seedlings in Step 4, I've found that using a butter knife to gently loosen the soil around the weak seedlings before snipping makes the process cleaner. The key is to disturb the roots of the plants you're keeping as little as possible. For the transplant into 6-inch pots, press the soil firmly around the roots to eliminate air pockets—kiwi seedlings are particularly sensitive to root suffocation. After transplanting, I always give the soil a gentle shake to help settle it around the roots before watering deeply.
Harden Off Gradually: The outdoor hardening process is where most seedlings fail. Start with just 1-2 hours in a sheltered spot—even if your seedlings look sturdy, this gradual exposure prevents shock. I've seen seedlings that looked perfect indoors wilt dramatically after just 3 hours of direct sun. Use a small fan on low setting near the seedlings during hardening to mimic wind conditions they'll face outdoors. This toughens their stems and prevents them from becoming "glasshouse babies" that snap easily in real-world conditions.
Pro Tips for Kiwi Fruit Seedling
- Here's what nobody tells you about turning kiwi seeds into thriving plants—without the trial-and-error.
- Stratification Success: The 4-6 week cold stratification period is non-negotiable for kiwi seeds.
- Lighting Strategy: Kiwi seedlings are light-sensitive divas.
Frequently asked questions
Got questions about growing kiwi fruit seedlings?
You’re not alone! Here are answers to the most common queries to help you avoid pitfalls and maximize success with your Actinidia seedlings.
How long does it take for kiwi fruit seeds to germinate?
Kiwi fruit seeds can take 4 to 12 weeks to germinate, depending on conditions. Warmth (70–80°F), moisture, and patience are key. Pro tip: Soak seeds for 24 hours before planting to speed up the process!
Do kiwi fruit seedlings need cold stratification?
Yes! Kiwi seeds require cold stratification (6–8 weeks in the fridge) to break dormancy. Skip this step, and germination rates drop dramatically. Store seeds in a damp paper towel in a sealed bag before planting.
Can I grow a kiwi tree from a store-bought fruit?
Just save the seeds, clean them, and follow the germination steps. Note: Store-bought kiwis are often hybrid varieties, so fruit quality may vary. For reliable results, opt for seeds from a known Actinidia plant.
Why aren’t my kiwi seeds sprouting?
Common culprits: old seeds (viability drops after 1–2 years), dry conditions, or lack of warmth. Try soaking seeds again, check moisture levels, and use a heat mat if needed. Patience pays off!
What’s the best soil mix for kiwi seedlings?
Use a well-draining, slightly acidic mix (pH 5.5–6.5) with 50% peat moss, 30% perlite, and 20% compost. Avoid heavy clay—kiwi roots hate soggy soil. A seed-starting tray works perfectly!
Wrapping up and next steps
Growing a kiwi fruit seedling from scratch is a rewarding journey that blends patience with the joy of nurturing life! 🌱 With the right materials, a dash of care, and a sprinkle of persistence, you’ll soon be watching those tiny sprouts transform into a thriving plant—ready to bear fruit in just a few years.
Remember, every expert gardener started with a single seed!
Ready to take the next step? Start with one seedling this season, and soon, you’ll be expanding your kiwi patch—or even sharing your green thumb with friends. Happy planting! 🌿