
Propagation
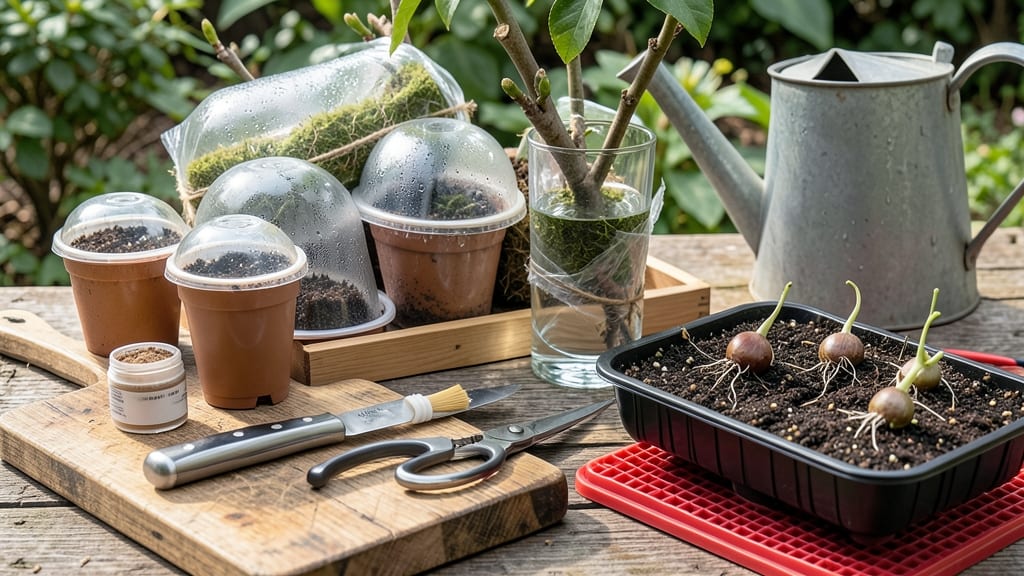
Fruit tree propagation guarantees you get exactly the variety you love—no surprises. 🌳 I’ve propagated apple, peach, and citrus trees this way, and the results are always better than seed-grown plants. The key is timing: late winter or early spring when trees are dormant but ready to wake up.
You’ll need sharp grafting tools, rootstock (the base tree), scions (the branches with the desired fruit), and grafting tape or rubber bands. My first attempt failed because I didn’t clean my tools properly—always sanitize everything with rubbing alcohol to avoid infections.
Once you’ve made clean cuts and wrapped the graft tightly, place it in a shaded, humid spot. Within 4-6 weeks, you’ll see new growth sprout from the grafted union. That’s when you know it worked—and you’re on your way to a thriving orchard.
This method works for apples, peaches, plums, and even citrus (with slight adjustments). The best part? You can multiply rare heirloom varieties that you’d never find at a nursery. Let’s get growing!
📚 In This Guide
- What you need
- Instructions
- Tips and common mistakes
- Wrapping up and next steps
What you need
- ● Healthy parent trees: Choose disease-resistant, high-yielding varieties (e.g., apples, peaches, or citrus).
- ● Grafting tools: Sharp grafting knife or budding knife (for clean cuts).
- ● Grafting tape or rubber bands (¼-inch width, 10+ feet).
- ● Pruning shears (for trimming scions).
- ● Rootstocks or cuttings: ½-inch to ¾-inch diameter, 6–12 inches long (softwood or hardwood, depending on season).
- ○ Grafting wax or sealant: (Optional but helpful for sealing cuts).
- ● Rooting hormone: (For cuttings—powder or gel formula).
- ● Containers/pots: 4–6 inch pots with drainage holes (for rooting cuttings).
- ● Potting mix: Well-draining blend (50% perlite/sand + 50% peat or coco coir).
- ● Plastic bags or humidity dome: (To retain moisture around cuttings).
- ● Spray bottle: For misting (keeps humidity high!).
- ● Grafting clips or T-bands (for alternative grafting methods).
- ● Heating mat (to speed up rooting of cuttings).
- ● Labeling tags + marker (track varieties!).
- ● Disinfectant (rubbing alcohol or bleach solution for tools).
- ● Grafting sleeve or tube (for protection in harsh climates).
Step-by-Step instructions for propagating fruit trees
Here's the straightforward method I've used to grow healthy fruit trees from cuttings and grafts.
🌱 Step 1: Select and Prepare Healthy Cuttings or Rootstock
Choose 6-12 inch long, pencil-thick shoots from last year's growth—look for smooth, green bark with no cracks or damage. The best time is late winter to early spring when the tree is still dormant. I like to take cuttings on a dry, cool day to prevent stress on the plant.
Make a clean cut just below a bud using sharp pruners. Remove all but the top 2-3 leaves to reduce moisture loss. Dip the cut end in rooting hormone (if using cuttings) to encourage root development. For grafting, select a compatible rootstock—this is key to success.
✂️ Step 2: Prepare the Rootstock or Cuttings for Planting
For cuttings, strip the lower leaves and make a shallow slit (about 1-2 inches deep) in the rootstock or potting mix. Insert the cutting so it stands upright but doesn't wobble. For grafting, align the cambium layers (the green layer just under the bark) of both the rootstock and scion (the cutting you're attaching).
Secure the graft with rafting tape or a plastic clip, leaving the bud exposed. If using cuttings, place them in a moist, well-draining mix of 50% perlite and 50% peat moss. Water lightly but avoid soaking—you want the soil to stay evenly moist, not soggy.
🌿 Step 3: Provide Ideal Conditions for Growth
Keep the cuttings or grafts in a warm, humid environment—I use a clear plastic bag over the pot or a propagation tray with a humidity dome. Place them in bright, indirect light (no direct sun yet). Maintain a temperature between 65-75°F for best results.
Check moisture daily—mist lightly if the soil feels dry to the touch. Avoid overwatering; yellowing leaves or mushy stems are signs of too much water. After 4-6 weeks, you should see new growth from the bud or roots forming on the cuttings.
⏰ Step 4: Transition to Outdoor Conditions
Once the graft has knitted (the cut surfaces have grown together) or the cuttings show strong root growth, it's time to harden them off. Move the pots outside for 1-2 hours the first day, gradually increasing exposure over 10-14 days. Choose a shaded, sheltered spot to avoid stress.
After 2-3 weeks, transplant the grafts or rooted cuttings into the ground or larger pots. Water deeply to help them establish. Keep an eye out for new leaves—this is your sign that the tree is thriving. Mulch around the base to retain moisture and protect the roots.
Tips & tricks for perfect fruit tree propagation
Real talk: The difference between thriving orchard trees and sad, wilted failures often comes down to these small but critical details.
Timing is Everything: In Step 1, when selecting your cuttings, aim for that sweet spot of late winter to early spring during dormancy. This is when trees have stored energy but haven't yet started active growth. I've tried summer cuttings, and they just don't have the same success rate—you'll notice the bark is often thicker and less responsive. If you must work outside this window, focus on pencil-thick shoots from last year's growth, as they've already proven their vitality.
Precision in Cuts: For Step 2, when making your shallow slit in the rootstock or preparing the cutting, think of it like making a precise surgical incision. Too deep and you damage the vascular system; too shallow and the cutting won't anchor properly. I use a clean, sharp knife and aim for about 1-2 inches deep—just enough to accommodate the cutting while maintaining stability. For grafting, that cambium layer alignment is absolutely critical. Hold a magnifying glass if needed to see that green layer clearly.
Environmental Control: During the 4-6 week growth period in Step 3, maintaining that 65-75°F temperature range makes all the difference. I use a small greenhouse or even a repurposed fish tank with a humidity dome to create that perfect microclimate. The key is consistency—fluctuations can shock the delicate new growth. Place your setup near a bright window but avoid direct sunlight, which can scorch tender leaves. A simple digital thermometer helps monitor those critical degrees.
Hardening Off Strategy: In Step 4, when you're ready to transition outdoors, start with those 1-2 hours of exposure and gradually increase. I've seen beginners rush this process, and their trees end up shocked by sudden environmental changes. Think of it like acclimating to a new climate—you wouldn't go from indoors to a tropical beach in one day! After 10-14 days of gradual exposure, your trees will be much more resilient when you finally transplant them. Look for that first sign of new leaves as confirmation they're adapting well.
Pro Tips for Fruit Tree Propagation
- Real talk: The difference between thriving orchard trees and sad, wilted failures often comes down to these small but critical details.
- Timing is Everything: In Step 1, when selecting your cuttings, aim for that sweet spot of late winter to early spring during dormancy.
- Precision in Cuts: For Step 2, when making your shallow slit in the rootstock or preparing the cutting, think of it like making a precise surgical incision.
Frequently asked questions
Got questions about growing your own fruit trees? Here are some of the most common ones—plus straightforward answers to help you succeed!
What’s the best time of year to take cuttings or graft fruit trees?
The ideal window depends on your method:
- Cuttings: Late winter to early spring (just before buds swell) or mid-summer (when growth is vigorous). Semi-hardwood cuttings work best in fall.
- Grafting: Late winter/early spring (dormant season) for rootstocks, or late spring/early summer for whip-and-tongue grafts when sap is flowing.
Check your local frost dates—timing matters more than the calendar!
Can I propagate fruit trees from seed?
Yes, but expect surprises! Seeds often produce seedlings—not identical to the parent tree. For example, a seed from your favorite apple may grow into a completely different variety. Save seeds for experimental trees; use grafting or cuttings for consistent results.
Why did my cutting fail to root?
Common culprits include:
- Improper cutting age (too young or woody).
- Wrong hormone treatment (or none at all).
- Poor moisture control (too dry or soggy).
- Low humidity or poor airflow.
Try again with semi-hardwood cuttings in a misting setup or rooting hormone. Patience is key—some take 4–8 weeks!
Do I need a special tool for grafting?
Not necessarily! While a grafting knife or budding tool makes it easier, you can use:
- A sharp pruning shear (for whip-and-tongue grafts).
- A razor blade or X-Acto knife (for budding).
Just ensure cuts are clean and precise. Sterilize tools with rubbing alcohol to avoid disease.
How long until my grafted tree bears fruit?
Patience pays off! Grafted trees typically take 3–5 years to bear fruit, depending on:
- The rootstock (dwarf varieties fruit faster).
- Tree species (stone fruits like peaches mature quicker than apples).
- Growing conditions (sun, soil, water).
Celebrate small wins—like new leaves or buds—as progress!
Wrapping up and next steps
Mastering fruit tree propagation—whether through grafting or cuttings—opens the door to a bountiful orchard without breaking the bank. 🌱 The key is patience, precision, and a little green thumb magic!
Whether you’re a beginner or a seasoned gardener, every successful tree starts with a single step—your first cutting or graft.
Ready to grow? Start small—try propagating a single apple or peach cutting this season. Watch it thrive, and soon, you’ll be sharing (or selling!) your homegrown harvest. Your orchard adventure begins now!