
Fertilization
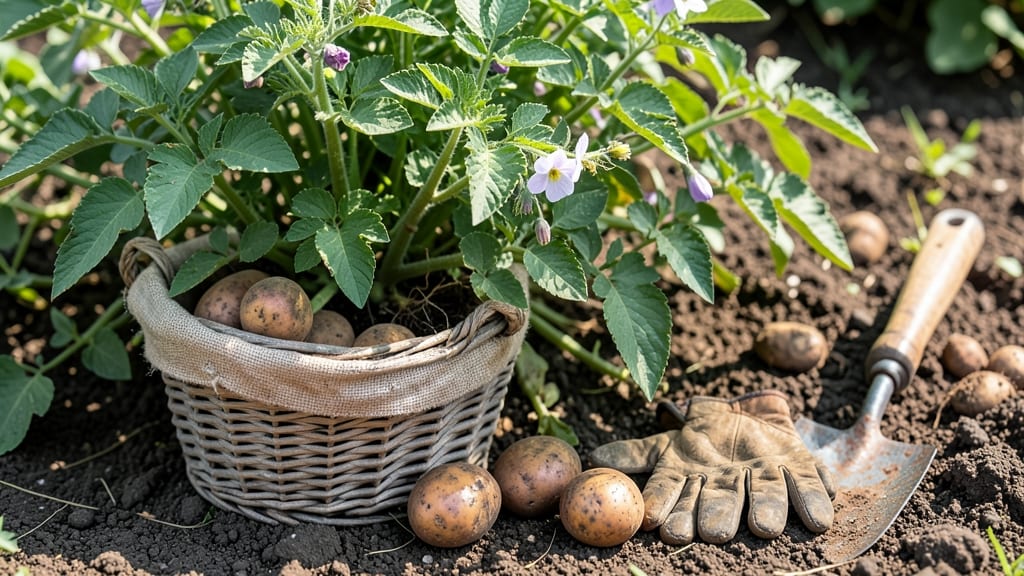
Growing edible potatoes is one of the most rewarding garden projects—imagine harvesting your own crisp, nutrient-packed tubers by summer. 🌱 The key is understanding what's actually edible (those tubers hiding underground) and ignoring the inedible "fruit" (the little berries that form after flowers).
I've learned the hard way that those berries are toxic, but the tubers? Pure gold.
Start with certified seed potatoes (not grocery store spuds—they're treated to prevent sprouting). Plant them in loose, well-draining soil when the ground reaches 45°F, about 4-6 weeks before your last frost.
Choose a sunny spot—they need 6-8 hours of light daily—and hill the soil as they grow to encourage more tubers. This method works even in containers if you have space.
By midsummer, you'll see green foliage, but the magic happens below ground. Gently harvest when the tops die back, and you'll uncover 5-10 pounds of potatoes per plant if conditions are right.
The secret to storage? Cure them in a dark, 50-60°F space for two weeks first—it thickens their skins and extends shelf life. No more sad, sprouted grocery store potatoes.
This method scales from small containers to full garden beds, and the same principles work for both red and sweet potatoes. The only real mistake? Planting too deep or in heavy clay—both stunt growth. Let's get those tubers growing!
📚 In This Guide
- What you need
- Instructions
- Tips and common mistakes
- Wrapping up and next steps
What you need
- ● Potato tubers: 5–10 organic, seed-certified potatoes (e.g., Yukon Gold, Red Pontiac, or Fingerlings). Avoid store-bought potatoes treated with sprouting inhibitors.
- ● Growing containers or garden bed: For containers: 5-gallon pots or larger (1 per plant, with drainage holes).
- ● For in-ground: Well-draining soil, 12–18 inches deep, in a sunny spot (6+ hours of light daily).
- ● Potting soil or compost: 2–3 bags of high-quality, peat-free potting mix or garden soil (amended with compost for fertility).
- ● Organic fertilizer: Balanced fertilizer (e.g., 5-5-5 or 10-10-10) or compost tea for slow-release nutrients.
- ● Watering can or hose with gentle spray nozzle.
- ● Pruning shears or scissors: For harvesting or trimming foliage.
- ● Garden gloves: Protect your hands from soil and thorns (if growing Solanum tuberosum varieties with prickly stems).
- ● Mulch (straw or grass clippings): Retains moisture and suppresses weeds.
- ● pH test kit: Ensures soil pH is 5.0–6.5 (ideal for potatoes).
- ● Row covers or shade cloth: Protects young plants from pests or excessive heat.
Step-by-Step instructions for growing safe, edible potato fruit
Here's how to grow nutritious, edible potato fruit safely in your garden.
🌱 Step 1: Choose the Right Potato Variety for Edible Fruit
Not all potatoes produce edible flowers or fruit—look for varieties specifically labeled for this purpose, like 'Purple Majesty' or 'Red LaSoda.' These heirloom types yield both tubers and decorative, flavorful blossoms. I always check seed packets for "edible flower/fruit" labels to avoid toxic varieties like 'Russet' or 'Idaho' potatoes, which are bred solely for tubers.
Start with certified organic seeds or disease-free seed potatoes to prevent blight and other issues. I soak my seed potatoes in lukewarm water for 12 hours before planting to encourage sprouting. This gives me a head start and ensures healthy growth from the beginning.
☀️ Step 2: Plant in Well-Draining Soil with Full Sun
Potato plants need 6-8 hours of direct sunlight daily and soil that drains well to prevent rot. I mix the existing garden soil with 2-3 inches of compost to enrich nutrients, especially potassium and phosphorus, which support both tubers and fruit production. The ideal soil pH is 5.0-6.5—test your soil if unsure.
Plant seed potatoes 4 inches deep and 12 inches apart in rows spaced 3 feet apart. This spacing gives plants room to sprawl and produce both tubers and fruit without competition. I cover the planted potatoes with 6 inches of straw mulch to retain moisture and regulate soil temperature.
💧 Step 3: Water Consistently and Fertilize for Fruit Production
Keep the soil evenly moist but not soggy—1-1.5 inches of water per week is ideal. I water at the base of the plant in the morning to reduce fungal risks. Too much water stresses the plant, while too little causes blossoms to drop before fruiting. You'll see the first flowers appear in 6-8 weeks, signaling it's time to increase fertilization.
Switch to a low-nitrogen, high-phosphorus fertilizer (like 5-10-10) when buds form. This supports flowering and fruiting instead of leafy growth. I also side-dress with compost every 4-6 weeks to keep nutrients steady. Watch for small green fruits forming behind the flowers—these are your edible potato berries!
✂️ Step 4: Protect Flowers and Young Fruit from Pests
Potato flowers and fruit attract pests like potato beetles and aphids. I handpick beetles daily and spray with neem oil if I see clusters of aphids. These pests can defoliate plants quickly, reducing both tuber and fruit yields. Cover young plants with floating row covers until flowering begins to deter early pests.
Remove any damaged or diseased foliage immediately to prevent spread. I also prune suckers (side shoots) to redirect energy to the main plant and fruit production. When fruits form, I gently support them with small stakes or cages to prevent cracking as they grow heavier.
🍅 Step 5: Harvest Fruit at Peak Ripeness
Edible potato fruit ripens 8-12 weeks after flowering, turning from green to a deep red, purple, or yellow depending on the variety. I harvest when the skin is firm but yields slightly to gentle pressure—like a ripe tomato. Cut the fruit from the stem with clean shears to avoid damaging the plant.
Use harvested fruit immediately or store in the refrigerator for up to 1 week. The flavor is tart and slightly sweet, perfect for salads or garnishes. I always save a few seeds from the fruit for next year's planting—they're easy to collect and store in a cool, dry place.
Tips & tricks for growing safe, edible potato fruit
Took me a while to figure these out, so here goes—your secret weapon for a bountiful harvest.
Selection Tip: When choosing seed potatoes for fruit production, look for varieties with thick stems and multiple eyes—they'll produce more vigorous plants. I've found that 'Red LaSoda' consistently yields the most fruit per plant, but 'Purple Majesty' gives the most dramatic color changes as it ripens. Avoid any potatoes with green skin or sprouts that look shriveled or moldy, as these can indicate disease.
Soaking Secret: That 12-hour lukewarm water soak in Step 1 isn't just about sprouting—it's also a great way to inspect your seed potatoes. Any that float are likely hollow inside and should be discarded. For the ones that sink, gently rub off any loose dirt to check for soft spots or signs of rot. This simple step can save you from planting inferior stock that might fail to produce fruit.
Sunlight Strategy: The 6-8 hours of direct sunlight requirement is non-negotiable, but here's the trick: if your garden gets afternoon shade, position your plants to catch the morning sun instead. Morning sunlight is less intense and helps prevent leaf scorch, which can stress plants and reduce fruiting. I've also noticed that plants in slightly elevated beds get better air circulation and more consistent sunlight exposure.
Pest Prevention: In Step 4, when you're dealing with potato beetles, don't just focus on the adults—watch for the bright orange eggs laid on the undersides of leaves. Scrape them off with your fingernail and drop them in soapy water immediately. I've found that a weekly neem oil spray (mixed according to package instructions) keeps both beetles and aphids at bay without harming beneficial insects. The key is consistency—don't skip applications just because you're not seeing pests yet.
Pro Tips for Potato Fruit Edible
- Took me a while to figure these out, so here goes—your secret weapon for a bountiful harvest.
- Selection Tip: When choosing seed potatoes for fruit production, look for varieties with thick stems and multiple eye...
- Soaking Secret: That 12-hour lukewarm water soak in Step 1 isn't just about sprouting—it's also a great way to inspec...
Frequently asked questions
Got questions about growing and enjoying potato fruit? Here are some of the most common inquiries—plus clear, practical answers to keep your harvest safe and delicious!
Can you eat potato fruit right off the plant?
The fruit of a potato plant (the small, green berries) contains toxic alkaloids like solanine—never eat them raw. Only the tubers (the edible part we dig up) are safe. If you accidentally ingest a berry, seek medical help immediately.
How long does it take for potato fruit to ripen?
Potato plant berries typically ripen in 4–6 weeks after flowering, depending on climate. They start green, turn yellow, and eventually red or orange. However, ripening doesn’t make them safe—they’re still toxic. Focus on harvesting tubers instead!
What’s the difference between potato fruit and edible tubers?
The confusion comes from the plant’s dual parts:
- Fruit (berries): Grow on vines, look like tiny tomatoes, and are not edible.
- Tubers (potatoes): Grow underground, are starchy, and are the only safe-to-eat part.
What if my potato plant’s tubers turn green or sprouts?
Green patches on tubers mean excess sunlight (toxic solanine builds up). Store potatoes in a cool, dark place (like a paper bag). Sprouts? Cut them off—don’t eat them. For sprouted tubers, peel away the green/sprouted parts before cooking.
Can I grow edible potatoes from the fruit (berries)?
Nope! Potato berries won’t grow into tubers—they’re seeds for more potato plants, but they’re not viable for eating. To propagate potatoes, use seed potatoes (small, certified disease-free tubers) instead. Save the berries for decorative purposes only!
Pro Tip:
If you’re curious about other edible berries from plants, try tomatoes (safe when ripe) or peppers—both are in the same nightshade family but are safe to harvest! Always research before tasting anything new.
Wrapping up and next steps
Growing your own edible potato fruit is a rewarding journey that connects you to nature while providing a nutrient-packed harvest! 🌱 Whether you're a seasoned gardener or a curious beginner, understanding the right conditions, soil prep, and fertilization ensures success.
With patience and care, you’ll soon enjoy homegrown tubers packed with vitamins, fiber, and energy-boosting benefits.
Ready to take the next step? Start by planting your seed potatoes this season—your future meals (and bragging rights!) will thank you. Happy gardening! 🌟