
Trees
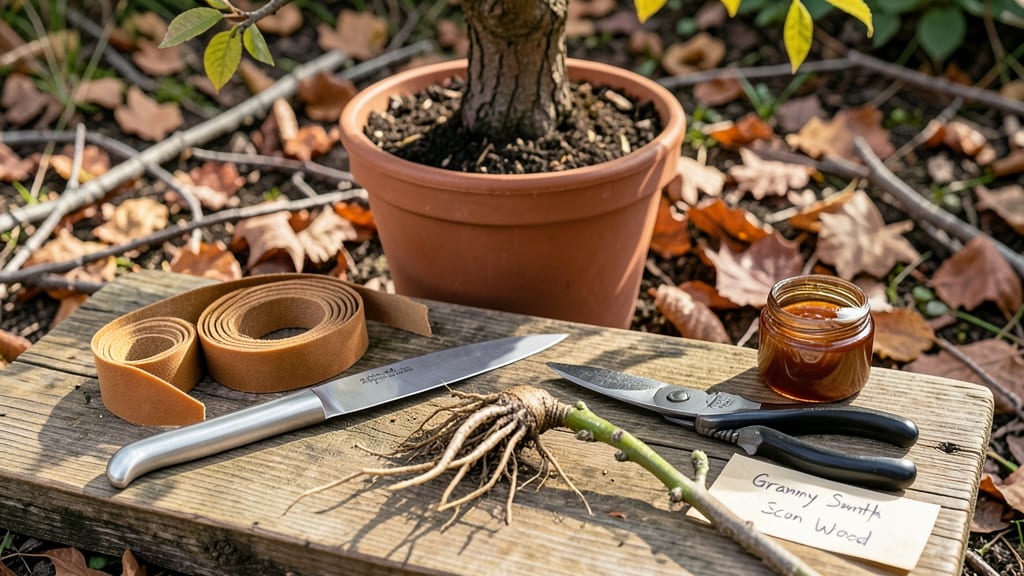
Splicing fruit trees lets you grow rare varieties on hardy rootstock—my 20-year-old peach tree started this way still produces like it's five years old. ✂️ The whip-and-tongue method creates a perfect bond between scion and rootstock, but timing and clean cuts make all the difference.
Most beginners struggle with the right tools or sealing the graft properly, but I’ll walk you through every step so your splice takes hold.
You’ll need a sharp grafting knife, grafting tape, sealing wax, and compatible rootstock-scion pairs—like a dwarfing apple rootstock with a sweet variety scion. The best time to splice is during dormant season (late winter), when the tree isn’t actively growing.
Start with a clean cut: the whip-and-tongue technique ensures maximum contact between the two pieces, which is key for success.
After splicing, wrap the graft with tape and seal it with wax to keep moisture in and pests out. Keep the area damp but not soggy for the first few weeks, and avoid pruning nearby branches that could stress the tree.
Within a few weeks, you’ll see a callus forming—that’s the tree’s way of sealing the deal.
Failed grafts usually happen from poor contact, drying out, or using incompatible varieties. If you see dieback or no new growth after a month, try again with a different scion. With practice, you’ll be creating stronger, more productive trees that outperform nursery-bought ones.
📚 In This Guide
- What you need
- Instructions
- Tips and common mistakes
- Wrapping up and next steps
What you need
- ● Sharp grafting knife or pruning shears – A clean, razor-sharp blade (e.g., a Felco #2 or Okatsune knife) is a must for precise cuts. Dull tools crush tissue and reduce success!
- ● Grafting tape or rubber tree band – 1–2 rolls (e.g., Tanglefoot Tree Wrap or Rubber Tree Band) to seal the splice and protect it from drying.
- ○ Pruning sealant (optional but recommended) – A wound dressing like Tanglefoot Tree Seal to prevent disease entry.
- ● Plastic bags or grafting clips – For humidity retention (e.g., plastic wrap or grafting clips for larger splices).
- ● Rope or twine – 1–2 yards of soft, flexible material (e.g., jute twine) to secure the splice.
- ● Scion wood – Healthy, dormant 1/8-inch to 1/4-inch diameter branches from the desired fruit tree variety. Collect in late winter/early spring!
- ● Rootstock – A compatible, disease-free young tree (e.g., seedling or whip-t) with a smooth, 1/2-inch diameter stem.
- ● Disinfectant (rubbing alcohol or bleach solution) – To sterilize tools between cuts and prevent contamination.
- ● Sharp pencil or marker – For labeling scions before grafting.
- ● Grafting wax – For sealing larger splices (e.g., Tanglefoot Grafting Wax).
- ○ Hormone rooting gel (optional) – To boost scion growth (e.g., Dip ‘N Grow).
- ● Greenhouse or shade cloth – To maintain 70–80% humidity post-grafting.
- ● Grafting manual or reference guide – For troubleshooting common issues.
Step-by-step instructions for splicing fruit trees
Here's how I approach grafting—clean cuts, precise alignment, and the right timing make all the difference.
🪴 Step 1: Select and Prepare Your Scions and Rootstock
Choose healthy 1/4-inch diameter scions from last year's growth—look for firm, disease-free wood with 3-5 buds. Your rootstock should have a clean 2-3 inch diameter stem, freshly cut with a sharp grafting knife. I always sanitize my tools with rubbing alcohol to prevent bacterial infections that can kill the graft.
Make your cuts just before grafting—scions lose moisture quickly. Strip the lower bark from the rootstock stem in a 1-inch vertical section using a grafting knife. This creates a clean surface for the scion to bond with. The key here is patience: rush, and you'll tear the cambium layer—the living tissue that connects the two plants.
✂️ Step 2: Make Precision Cuts for the Splice Graft
For the scion, make a diagonal cut about 2 inches long on one end, starting just above a bud. Then, cut a matching diagonal on the opposite side, about 1/4 inch away—this creates a wedge. The goal is a clean, straight cut that exposes the cambium layer on both sides.
On the rootstock, make a vertical slit about 1-1/2 inches long that goes halfway through the stem. The slit should be wide enough to fit the scion's wedge snugly. Here's the thing—if the fit isn't tight, the graft won't take. Test the scion in the slit before making the final cut to ensure a perfect match.
🌱 Step 3: Insert and Secure the Scion
Slide the scion into the rootstock slit until the cambium layers align perfectly. You'll feel a slight resistance—this means the graft is seated correctly. If it slides in too easily, the cut wasn't deep enough. Wrap the graft union tightly with rafting tape, starting just below the cut and ending above it. Leave no gaps—moisture and air will kill the graft.
Seal the entire union with rafting wax to lock in moisture and block out bacteria. I use a small brush to apply a thin, even layer over the tape and exposed wood. The wax hardens quickly, so work fast. This step is critical: a dry graft won't heal, and an infected one will fail.
☀️ Step 4: Protect and Monitor the Graft
Place the grafted tree in a shaded, humid environment for the first 2-3 weeks. I use a clear plastic bag secured loosely over the graft to maintain high humidity without trapping too much heat. Check daily for condensation—if the bag fogs up, the humidity is perfect. If it stays dry, mist the inside lightly with water.
After 3-4 weeks, the graft should show signs of taking: new growth at the bud union or slight swelling at the graft line. Remove the plastic bag gradually over 5-7 days to avoid shocking the tree. If you see yellowing leaves or wilted growth, it's a sign of stress—reduce sunlight and increase water slightly until the tree stabilizes.
⏰ Step 5: Prune and Train for Strong Growth
Once the graft has fully healed (usually 6-8 weeks), prune the rootstock 6 inches above the graft and remove any competing shoots. This ensures the scion takes over completely. I also trim the scion back to 2-3 buds above the graft to encourage strong, vertical growth.
Fertilize lightly with a balanced 10-10-10 formula once new growth appears—too much nitrogen now will weaken the graft. Water deeply once a week during dry spells, keeping the soil evenly moist but not soggy. You'll know you've succeeded when the tree produces fruit matching the scion variety within 2-3 years.
Tips & tricks for precision fruit tree grafting
These essential techniques will help you avoid common pitfalls and achieve successful splice grafts every time.
Tool Preparation: Sharpen your grafting knife before starting—dull blades tear the cambium layer instead of cutting cleanly. I test my knife by slicing through a piece of paper; if it drags, it needs honing. A clean cut exposes the cambium perfectly, which is critical for successful bonding. The 1-inch vertical strip on the rootstock should be smooth, not jagged, to prevent air pockets that could kill the graft.
Scion Selection: Look for scions with 3-5 buds that are firm to the touch, not soft or shriveled. The bud at the top of the wedge should be plump and green, indicating it's ready to grow. I always select scions from last year's growth—they've had time to mature and store energy for new growth. Avoid scions with cracks or discoloration, as these can introduce disease to your graft.
Graft Union Alignment: When inserting the scion, the cambium layers must align perfectly—this is the living tissue that connects the two plants. If you're unsure, make a shallow cut through the bark on one side of both the scion and rootstock to create a visual guide. The cambium appears as a thin green layer just beneath the bark. A well-aligned graft feels snug but not forced, like a tight handshake.
Post-Graft Care: After sealing with grafting wax, place your grafted tree in a shaded area with high humidity for the first 2-3 weeks. I use a clear plastic bag secured loosely over the graft to maintain humidity, but leave it slightly open to allow airflow. Check daily for condensation inside the bag—this confirms the right moisture level. If the bag stays dry, mist the inside lightly with water to prevent dehydration of the graft union.
Pro Tips for Splice Fruit Trees
- These essential techniques will help you avoid common pitfalls and achieve successful splice grafts every time.
- Tool Preparation: Sharpen your grafting knife before starting—dull blades tear the cambium layer instead of cutting c...
- Scion Selection: Look for scions with 3-5 buds that are firm to the touch, not soft or shriveled. The bud at the top ...
Frequently asked questions
Got questions about splicing fruit trees? You’re not alone! Here are some of the most common concerns—plus clear, practical answers to help you graft with confidence.
What’s the best time of year to splice fruit trees?
The ideal window is late winter to early spring (just before buds swell but before leaves emerge). This timing ensures the tree is dormant but ready to heal quickly. Avoid grafting during extreme cold or heat—consistency is key!
Can I splice fruit trees without a grafting knife?
While a sharp grafting knife is ideal, you can use a clean, sterilized razor blade or pruning shears in a pinch. Just ensure cuts are smooth—jagged edges slow healing. Pro tip: wipe tools with rubbing alcohol to prevent disease transfer!
Why did my graft fail? How do I troubleshoot?
Graft failures often stem from poor fit, drying out, or disease. Check for:
- Graft union: Should look tight, not loose or cracked.
- Callus formation: A white, fuzzy growth at the splice indicates success.
- Moisture: Wrap with grafting tape or use a plastic bag temporarily.
Do I need to seal the splice with wax or tape?
Yes! Use grafting tape or wax to seal the cut and retain moisture. Tape is easier for beginners, while wax works better for larger grafts. Remove tape after 4–6 weeks once the union heals. Think of it as a bandage for your tree!
Can I splice any two fruit trees together?
No—compatibility matters! Trees must be in the same genus (e.g., apple + crabapple) or closely related (e.g., peach + plum). Cross-grafting incompatible species (like citrus + apple) will fail. Always research rootstock-scion pairs first!
Wrapping up and next steps
Splicing fruit trees is a rewarding skill that can transform your orchard’s productivity with precision and care. By mastering the techniques—whether whip-and-tongue, cleft, or bark grafting—you’re not just pruning; you’re engineering stronger, more resilient trees that yield better fruit. The key? Patience, sharp tools, and a little practice!
Ready to take the next step? Start with a single graft on a young tree, and soon you’ll be expanding your orchard’s diversity like a pro. Happy grafting! 🌱✨