
Fertilization
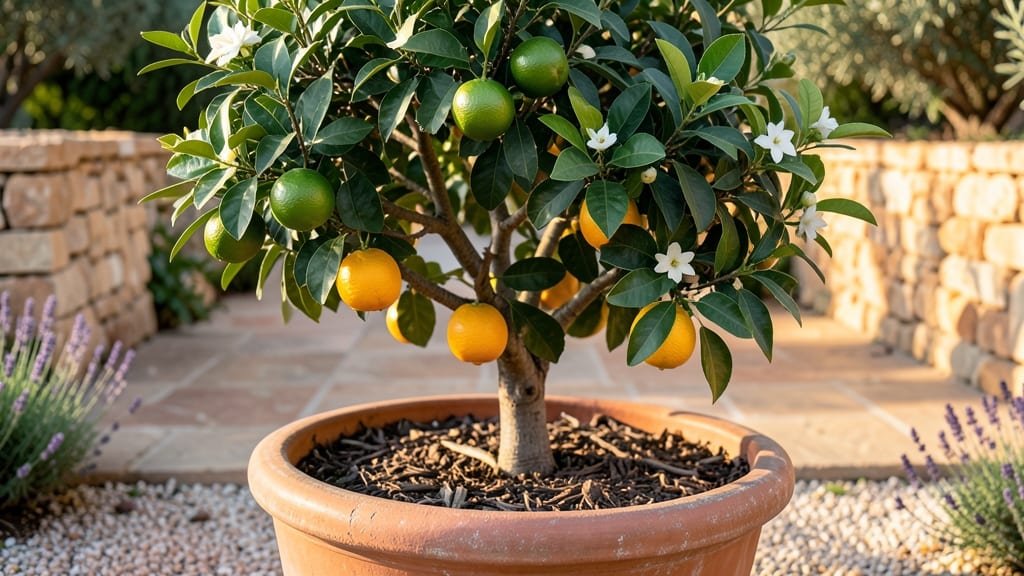
Growing bitter orange fruit means fragrant blossoms and tart, fragrant fruit that outshine store-bought citrus. 🌿 I learned the hard way that these trees thrive in warm climates but can adapt with the right care—even in cooler zones with winter protection.
The secret isn’t just sunshine; it’s about mimicking their natural Mediterranean habitat at home.
You’ll need well-draining soil, a sunny spot (at least 6 hours of light daily), and patience—these trees take 3-5 years to bear fruit. Most people overwater, leading to root rot, so focus on deep, infrequent watering.
In colder zones, bring potted trees indoors before frost or wrap young trees in burlap for protection.
By summer, you’ll be harvesting bright orange fruit that smells like a Moroccan marketplace. The fruit may be too bitter to eat raw, but it’s perfect for marmalade, perfumes, or garnishes.
Prune in late winter to shape the tree and remove dead wood, and watch for pests like aphids—neem oil keeps them at bay.
Even in small spaces, bitter orange trees work—just choose dwarf varieties like ‘Four Seasons.’ With the right balance of sun, water, and winter care, you’ll enjoy year-round harvests and the sweetest-smelling blossoms in your garden. Let’s get those roots growing!
📚 In This Guide
- What you need
- Instructions
- Tips and common mistakes
- Wrapping up and next steps
What you need
- ● Bitter Orange Seed or Sapling: 1 high-quality seed (from an organic source) or
- ● 1 1–3-year-old sapling (bare-root or potted, disease-free)
- ● Well-Draining Soil Mix: 50% premium potting soil (e.g., Miracle-Gro or Fox Farm Ocean Forest)
- ● 30% perlite or coarse sand (for aeration)
- ● 20% compost or worm castings (for nutrients)
- ● Pot or Garden Space: For containers: 15–20 gallon pot with drainage holes (terracotta or fabric recommended)
- ● For ground planting: Full-sun location (6+ hours/day) with loose, slightly acidic soil (pH 6.0–7.5)
- ● Fertilizer: Balanced citrus fertilizer (e.g., 10-10-10 NPK or 8-3-9 with micronutrients)
- ● Slow-release granules or liquid feed (follow package rates)
- ● Watering Supplies: Watering can with a rose attachment or drip irrigation kit
- ○ Moisture meter (optional but helpful for containers)
- ● Pruning Tools: 1 pair of sterilized bypass pruners (for clean cuts)
- ● 1 small hand saw (for thicker branches)
- ● Rubbing alcohol (70%+) for tool sanitization
- ● Mulch: 2–3 inches of wood chips or straw to retain moisture and regulate soil temp.
- ● Support Stakes: 2–3 bamboo stakes + garden twine (for young saplings in windy areas).
- ● Pest Control: Neem oil spray (for aphids/mites)
- ● Yellow sticky traps (for whiteflies)
- ● Growth Boosters: Citrus-specific Epsom salt (magnesium sulfate) for green foliage
- ● Hydrogen peroxide (3%) to sterilize soil or pruning wounds
- ● Harvesting Gear: Sharp knife or shears (for fruit picking)
- ● Glove (to protect from thorns)
Step-by-step guide to growing bitter orange trees
Here’s how to cultivate your own fragrant, edible citrus tree with minimal fuss.
🪴 Step 1: Select the Right Variety and Location
Bitter oranges (Citrus aurantium) thrive in USDA Zones 8-11 and need full sun (6+ hours daily). Choose a dwarf variety like 'Chinotto' for containers or a standard tree for ground planting. I always pick a spot with shelter from cold winds—these trees hate sudden temperature drops below 30°F. If you live in a cooler climate, grow yours in a large pot so you can move it indoors during winter.
Test your soil first—bitter oranges prefer slightly acidic to neutral pH (6.0-7.5). Amend heavy clay with 2-3 inches of compost before planting. The roots need good drainage, so avoid low-lying areas where water pools. I like to dig a hole twice as wide as the root ball to encourage outward root growth, which makes the tree more stable.
☀️ Step 2: Plant at the Right Time and Depth
Plant in early spring after the last frost date, when soil temperatures stay above 60°F. Dig a hole 10-12 inches deep and wide, then mix the native soil with half compost to improve fertility. Place the tree so the graft union (the bump where the rootstock meets the scion) sits 2-3 inches above soil level—this prevents rot and makes future pruning easier.
Gently loosen the roots if they’re circling the pot, then spread them outward in the hole. Backfill with the soil-compost mix, tamping lightly as you go. Water deeply to settle the soil, then add a 2-inch layer of mulch (avoid touching the trunk). The mulch keeps roots cool and retains moisture—just remember to pull it back slightly as the tree grows to prevent rot.
💧 Step 3: Water and Fertilize for Strong Growth
Water deeply once a week for the first month, then taper to every 10-14 days once established. You’ll know it’s time when the top 2 inches of soil feel dry—bitter oranges hate soggy roots. I use a drip irrigation system for containers to avoid wetting the leaves, which can cause fungal issues. If growing in the ground, water at the base in the morning so foliage dries quickly.
Fertilize every 6-8 weeks starting in spring with a balanced citrus fertilizer (6-6-6 or 8-3-9). Follow the package rates—over-fertilizing burns roots. In late summer, switch to a low-nitrogen, high-potassium formula (3-1-5) to encourage fruiting. I also add Epsom salt (1 tablespoon per gallon of water) monthly for magnesium, which prevents yellowing leaves—a common bitter orange problem.
✂️ Step 4: Prune for Shape and Fruit Production
Prune lightly in late winter (before buds swell) to remove dead, crossing, or inward-growing branches. Use clean, sharp pruners and cut just above a leaf node at a 45-degree angle. I aim for an open vase shape—this allows sunlight and air to reach the center, where fruit often forms. Avoid heavy pruning; bitter oranges fruit on older wood, so you don’t want to remove too many mature branches.
After flowering (usually spring to early summer), thin clusters to 3-5 fruits per branch—this ensures larger, sweeter oranges. Remove any fruit that forms on new growth (called "water sprouts") since these rarely ripen well. You’ll also want to remove suckers (shoots growing from the base or rootstock) regularly—they drain energy from the main tree.
🍊 Step 5: Harvest and Overwinter for Next Year
Bitter oranges ripen 9-12 months after flowering, typically in late fall to winter. You’ll know they’re ready when the skin turns deep orange-yellow and yields slightly to gentle pressure. Harvest by twisting gently or cutting with pruners, leaving a short stem. Store at room temperature for up to 2 weeks or refrigerate for 1-2 months—they’ll keep longer if slightly underripe.
If you’re in a cold climate, bring potted trees indoors before temperatures drop below 40°F. Place them near a south-facing window or under grow lights (12-14 hours daily). Reduce watering to every 3-4 weeks and fertilize lightly in winter. In spring, move them back outside gradually to avoid shock. I’ve kept mine alive for years this way—just be patient with the transition.
Tips & tricks for perfect bitter orange tree cultivation
These tried-and-true insights will help you avoid common pitfalls and grow a thriving bitter orange tree.
Location Selection: When choosing your planting spot, pay special attention to microclimates. I’ve seen bitter oranges thrive in areas that get full sun but are protected from afternoon winds—especially important in coastal regions where salt spray can damage leaves. If your yard has multiple exposures, test soil pH in each potential spot before deciding. The 6.0-7.5 pH range is ideal, but even small variations can affect nutrient uptake.
Planting Depth: The 2-3 inches above soil level for the graft union is non-negotiable—this prevents rot and ensures the tree develops strong roots. I’ve learned this the hard way after seeing trees planted too deep develop root girdling issues. After planting, gently press the soil around the roots to remove air pockets, then water thoroughly. The 2-inch mulch layer should be kept away from the trunk to prevent moisture buildup that can cause fungal problems.
Winter Care: For potted trees, the transition indoors is critical. I’ve found that moving trees too early (before 40°F) can shock them, while waiting too long risks cold damage. Place them under grow lights (12-14 hours daily) to maintain photosynthesis during winter. Reduce watering to every 3-4 weeks—overwatering in winter is a common mistake that leads to root rot. In spring, acclimate the tree to outdoor conditions gradually over 7-10 days to prevent leaf scorch.
Pruning Strategy: The open vase shape isn’t just aesthetic—it’s functional. I aim to create a structure where sunlight penetrates to the center, which is where most fruit develops. When thinning clusters to 3-5 fruits per branch, prioritize larger, healthier-looking fruit. Remove suckers regularly—they compete with the main tree for nutrients and can weaken overall growth. Always use clean, sharp pruners to make clean cuts that heal quickly.
Pro Tips for Bitter Orange Fruit
- These tried-and-true insights will help you avoid common pitfalls and grow a thriving bitter orange tree.
- Location Selection: When choosing your planting spot, pay special attention to microclimates. I’ve seen bitter orange...
- Planting Depth: The 2-3 inches above soil level for the graft union is non-negotiable—this prevents rot and ensures t...
Frequently asked questions
Got questions about growing bitter orange fruit? You’re not alone! Here are some of the most common inquiries—plus quick, actionable answers to keep your citrus tree thriving.
How long does it take for a bitter orange tree to bear fruit?
A bitter orange tree typically takes 3–5 years to produce fruit from seed, but grafted trees can bear fruit in just 1–2 years. Patience is key—focus on proper care (sunlight, water, and fertilizer) to speed up the process.
Can I eat bitter orange fruit raw, or is it only used for marmalade?
While bitter orange fruit is too tart and seedy to eat raw, it’s a star in marmalade, desserts, and even cocktails (like Triple Sec). The peel is often candied or used in perfumes. If you’re curious, try a tiny piece—it’s extremely bitter!
Why are my bitter orange leaves turning yellow?
Yellow leaves usually signal overwatering, nutrient deficiency, or pests. Check the soil—it should be dry to the touch 1–2 inches down. Test for citrus leaf miner or scale insects on the undersides. Adjust fertilizer (low nitrogen) and prune affected branches.
Do bitter orange trees need cold weather to produce fruit?
Bitter oranges are tropical/subtropical and thrive in USDA Zones 9–11. They don’t need cold dormancy like some citrus, but light frost can damage them. In colder climates, grow them in containers and bring them indoors.
What’s a good alternative if I can’t grow bitter orange?
If you’re after the flavor or aroma, try Seville orange (similar marmalade use) or Calamondin orange (smaller, sweeter-tart). For ornamental value, Mexican lime (Key lime) or Kumquat are great picks. Both are easier to grow in containers!
Wrapping up and next steps
From soil prep to pruning, growing bitter orange fruit is a rewarding journey that brings vibrant citrus to your garden year-round! 🌱 With the right fertilization techniques—like balanced NPK ratios and organic boosts—your tree will thrive and produce abundant, fragrant fruit.
Don’t let challenges like pests or seasonal shifts discourage you; armed with knowledge, you’ll cultivate a lush, productive tree that’s the envy of your neighborhood.
Ready to take the next step? Start small: plant your bitter orange today, or experiment with a potted tree if space is limited. Track your progress, adjust as needed, and soon, you’ll be harvesting homegrown citrus to enjoy fresh or share with friends. Your citrus paradise awaits—get growing! 🍊✨